Lancia Beta Forum
November 22, 2024, 04:35:44 AM *
Welcome, Guest. Please login or register.

Login with username, password and session length
News: 2024 Events Calendar http://www.betaboyz.myzen.co.uk/forum/index.php?board=92.0
Please feel free to add more.
 
   Home   Help Contact Admin Search Calendar Gallery Articles Login Register  
Pages: 1 ... 9 10 [11]
  Print  
Author Topic: Lancia Beta HPE 2.0 IE Track Car Blog  (Read 179599 times)
0 Members and 1 Guest are viewing this topic.
lbcoupe76
Sr. Member
****
Offline Offline

Australia Australia

Posts: 149


« Reply #200 on: July 08, 2016, 06:08:30 AM »

Nice, are they the doors from Belgium? are they good? want to get them myself.
Logged

1976 Beta coupe 1800 "Kermette"
1975 Beta coupe 1800 x 2
1974 Beta Berlina 1800
1989 Thema i.e turbo
1988 Thema i.e turbo
Fiat 1500


Smoke me a Kipper i'll be back for breakfast
lanciamad
http://www.flickr.com/photos/lanciamad
Hero Member
*****
Offline Offline

England England

Posts: 699


Marcus Robinson


« Reply #201 on: August 20, 2016, 06:07:57 PM »

Nice, are they the doors from Belgium? are they good? want to get them myself.
I bought them from someone selling them on ebay, I believe from Belgium but it wasn't from Guy that runs the abarth museum over there. Pretty happy with them, a few imperfections and scratches to deal with but nothing a few hours filling and sanding won't sort, the least of my worries compared to the adjustments i'll have to make for them to fit the HPE  Smiley
Have followed this for a couple years now, but now Im must ask about your lower pulley with the timing wheel...

I think you mentioned that you purchased it from BetaBoyz?  I haven't seen it on the website, was it a special order item?  I need 2-3 of them myself for EFI projects that I have building up in my garage.

Does anyone else know a source for these?

thanks in advance


If you mean the crankshaft pulley, then mine was bought from millers mule that incorporated the correct number of grooves for me to still run the power steering and had a 36-1 trigger wheel fitted.

Well a lot has happened since the MOT, but not with the car unfortunately, not taxing it until last month, the only mileage it's done since driving back from the garage has been around the block a few times and a 6 mile journey to it's new home where i've moved to, hence the lack of funds and time for the car. Certainly the best 6 miles i've driven for a while  Grin
As well as this, Buddy the labradoodle has also joined the household...

As you can see, i've trained him well, already getting the bug to get his paws dirty...

The dished OMP steering wheel I had on it, started to disintegrate a bit so the latest change is now to a momo more flat style wheel with a chunkier feel...

The bucket seats i've had in it for a good few years are a bit tired and harsh on the back for road journey's especially as most shows are around the 2 hour mark, not that i've had chance to get to many Undecided, so i've got these more padded style bucket road seats to try, but do plan on eventually investing in a full wrap around style bucket seat, but it's all ££££, this will do for now...

With moving into the house and Buddy around, i've still had the beta in the back of my head of what a mammoth amount of work needs and could be done on it, and conveniently with the new shed built (ideal spray booth), the collection of panels to go on the car at my parents place have slowly been coming over to be worked on and sprayed up. The pictures don't show the extent of the lacquer peel and dullness the paint has gone but this is what she looks like now...

With that in mind, and wanting to get back stuck into it, fibreglass is the way forward, the amount of weight saving overall i think will be quite considerable and to not worry about rust ever appearing again on almost half the car, i've made a start. I can't ever consider getting a proper spray job done in the next year or two, so for now have had a go myself, it's going to at least be an improvement if not an immaculate job, fibreglass wings....

Front valance is of an earlier model and still made of steel...

Having decided to bite the bullet, I ordered a fibreglass bonnet from Guy in Belgium, it's been something i've always wanted to get for the car since I bought it 10 years ago Shocked and just seemed the right timing to do all this work together, so here it is as it arrived...

A few imperfections to sort and bit of extra bits and pieces to trim it turned out reasonably well...

Back into the collection of spares, I dug out a good condition bonnet trim and gave it a once over...

Having got the bonnet sprayed up, thoughts turned to how I wanted to attach it, with the current bonnet being attached by two bonnet pins and the original hinges, i've decided it would be better if the whole bonnet could be removed quickly and easily and thought i'd move away from the usual bonnet pins and go with 4 aerocatch's that the btcc cars use...

The moment you think, "should I be doing this"...

Too late  Shocked Tongue...

No regrets, really think the silver and black work well...

I've still got to weld up an area where one of the mounting points will be and look into what the bonnet or an aerocatch is fouling on to lower the bonnet nearest the windscreen so it sits flush but this is what it'll look like, probably the best pic to show the difference from new paint and old...

Plan is to also ditch the standard front sidelight/indicator units i've used since removing the bumper and I will run the sidelights inside the dipped beams and then have a single slightly smaller indicator unit mounted on the valance. With that in mind, I am also contemplating whether to see if I can adapt the front VX spoiler in some way, I presume it normally mounts and is shaped for the front bumper so lots of cutting will probably be required and not sure of what else may need blanking for it to look quite right, but I guess it'll be trial and error...

and finally, back in the day, hopefully this will happen again sometime soon... Smiley


Logged

1982 - Lancia Beta HPE 2000ie http://www.betaboyz.myzen.co.uk/forum/index.php?topic=472.0
1989 - Lancia Delta 16v integrale
1992 - Lancia Thema 2.0 16v Turbo
2001 - Honda Civic Type R EP3
Neil-yaj396
Legendary Member
******
Offline Offline

Posts: 1942


1979 1300 Coupe


« Reply #202 on: August 21, 2016, 07:42:40 AM »

Quite a bit of progress there. Your paint work looks fine on the photos.

Funny how the fibreglass bonnet is basically a replica of the original (which I guess was used to make the mold). Couldn't they have saved even more weight by using more basic bracing on the underside?
Logged
WestonE
Legendary Member
******
Offline Offline

United Kingdom United Kingdom

Posts: 1772


« Reply #203 on: August 22, 2016, 06:46:49 AM »

Marcus

Great work. I think you would be better with a chin spoiler via ebay than trying to mod the VX item unless you cut away the whole area that was behind the bumper.

Keep it coming.

Eric
Logged
lanciamad
http://www.flickr.com/photos/lanciamad
Hero Member
*****
Offline Offline

England England

Posts: 699


Marcus Robinson


« Reply #204 on: November 14, 2016, 06:13:03 PM »

Quite a bit of progress there. Your paint work looks fine on the photos.

Funny how the fibreglass bonnet is basically a replica of the original (which I guess was used to make the mold). Couldn't they have saved even more weight by using more basic bracing on the underside?

Thanks Neil Smiley, to be honest; I think for cost vs. appearance it's ok, i'm not one for show and shine and let's face it, it wouldn't get very far in a concourse competition! But the idea is purely to make it presentable again for a few years, it may need the odd touch up here and there, but i'd rather spend bits and pieces on other idea's than keeping it immaculate. It had a reasonable "restoration" getting on for probably 8 years ago, and with the paint issue a year after being done, and then the usual hot spots of rust showing through again, if I have to do a few area's every couple of years it will keep it tidy'ish (and me busy) Cheesy As your see further down this post, i've done a bit more, and has probably come to around £150-£200 all in, so in comparison to a full respray job probably 10 times that i'm happy enough with it Cool
With the bonnet, I think it's negligible whether you could really make it much lighter with having enough strength to keep the outer skin from flexing anymore than it already does, but I was certainly surprised that they went to the effort of replicating an original to that degree

Marcus

Great work. I think you would be better with a chin spoiler via ebay than trying to mod the VX item unless you cut away the whole area that was behind the bumper.

Keep it coming.

Eric

I think your right Eric, I see Mark is now selling a front spoiler that looks pretty good, but not sure whether I will be bothering yet, starting to like the front end as it is and the amount of sleeping policemen and kerbing about now, i'd probably spend more time fixing it back on than anything else Cheesy

So onto the latest updates...

Bodywork. The replacement fibreglass wings I bought sometime ago are for the earlier cars, so it was off with the front end and on with the replacement early series valance and wings, lot's of little bit's and pieces to cut out to get the wings to fit but at a glance wouldn't tell much of a difference. Just finishing lining everything up, and thought i'd fit a stick on plate lower down out of the way of the radiator...
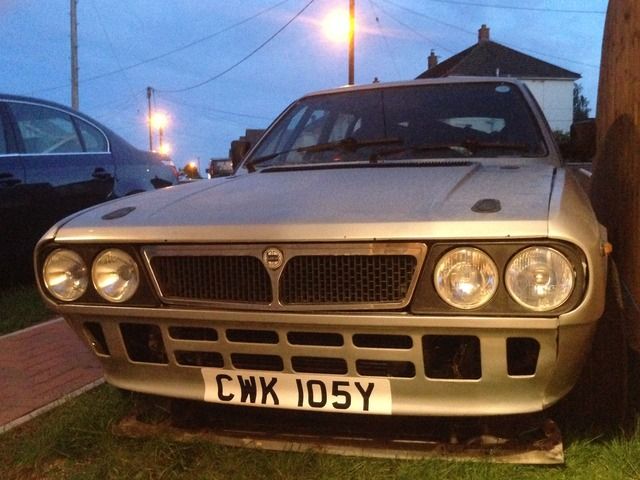

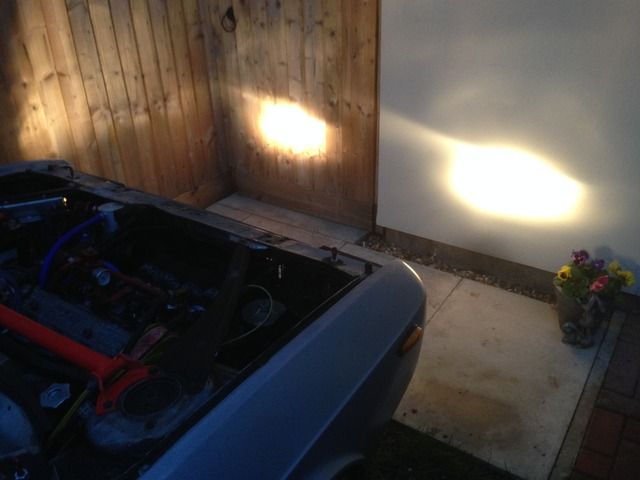
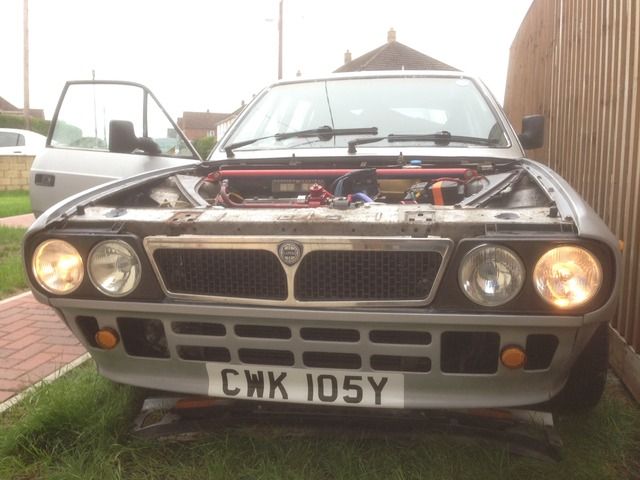
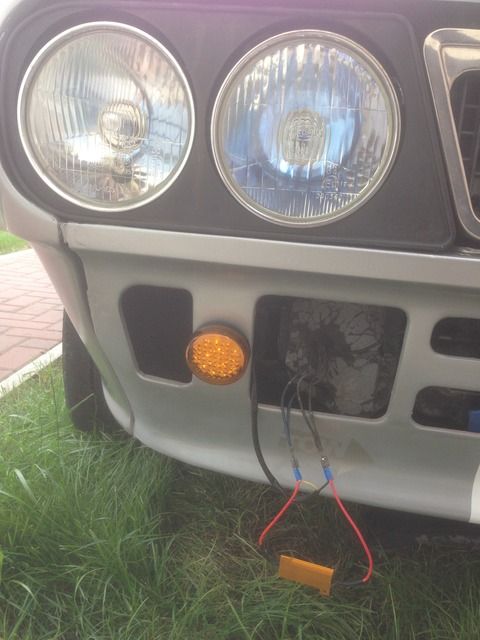
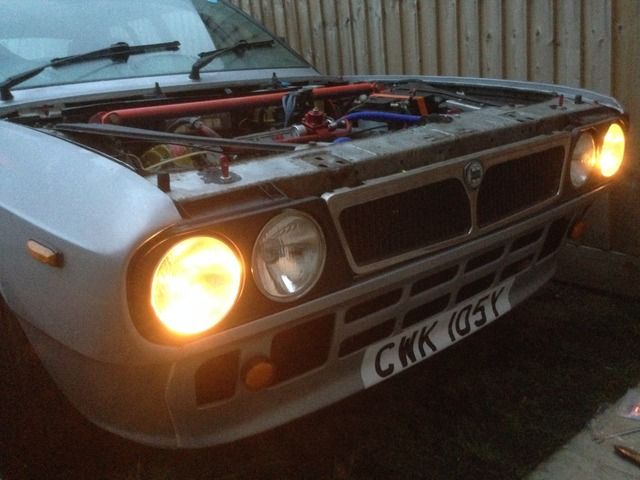
The original sidelight/indicator units taken out of the IE front bumper did the job but weren't particularly attractive nor slim fitting, so i've moved the sidelights into the dipped beam unit's and fitted round LED unit's to the front which had it's own implications...

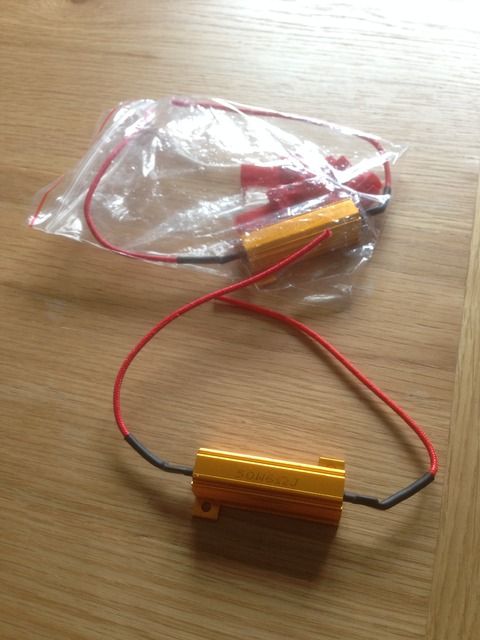
Because the LED unit's as I soon found out, have a lot less resistance than a standard bulb the relay would flicker quickly as if a bulb had been blown, consequence of this, i've had to fit a resistor in line which has done the job...
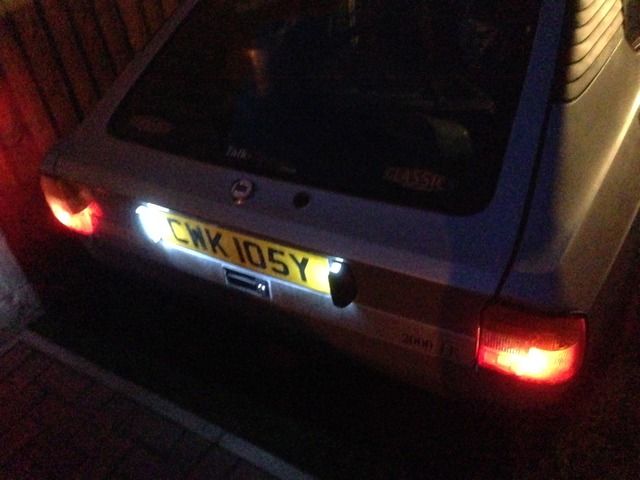
Down the other end, I also replaced the rear number light unit's i've been using for LED, which showed up some resistance issues i've bypassed, more on that later...

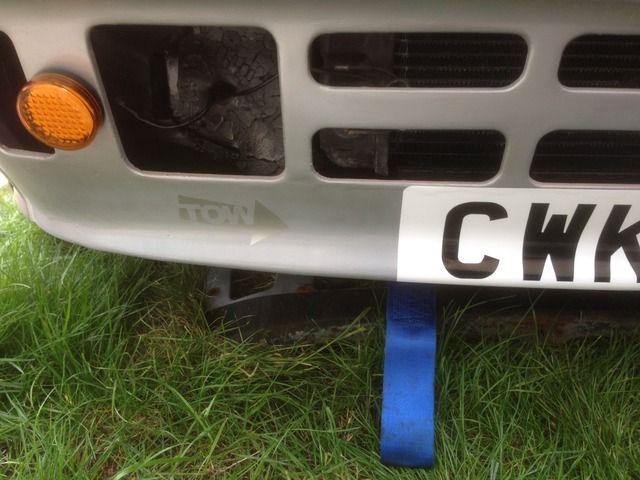
Back up front. Just because you never know, and I never know if i'll be using it on track again I thought i'd fit a tow strap that tuck's nicely out of the way behind the valance and mounted to the subframe. The obvious choice is normally to have a red, maybe black tow sticker, but I thought i'd go with a subtle grey against the silver for now...

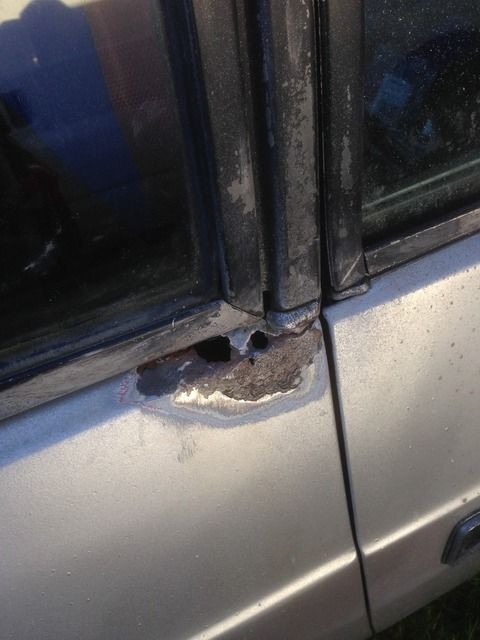
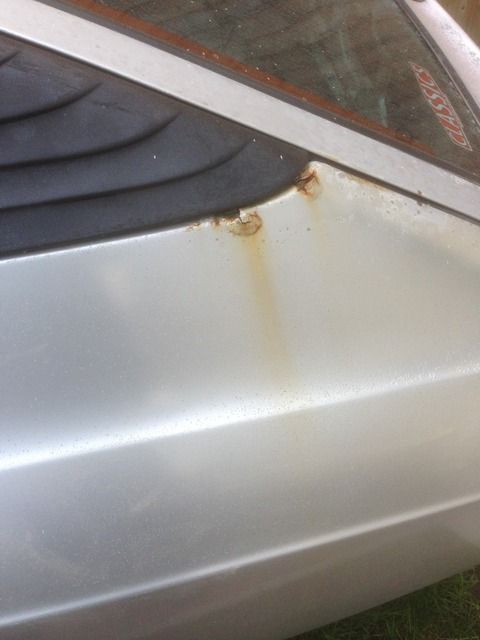
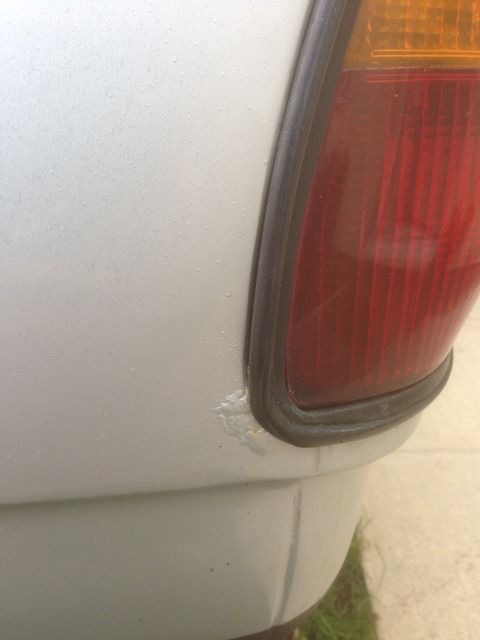
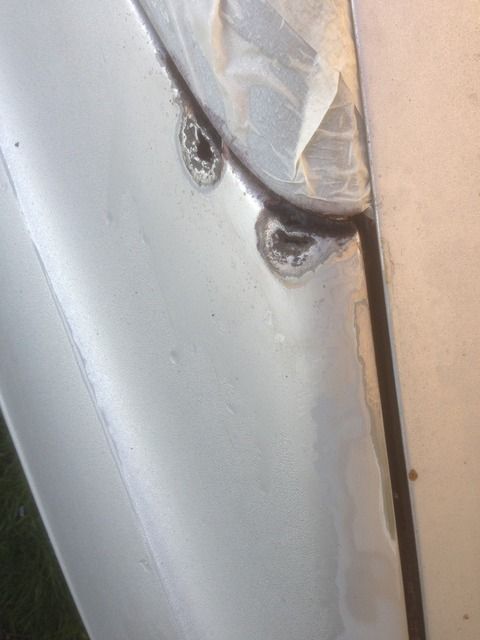
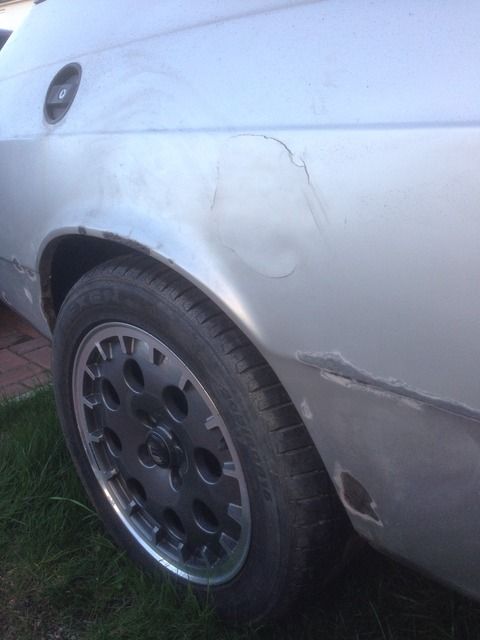
Some examples of the worst area's than needed attention before they got too out of hand...


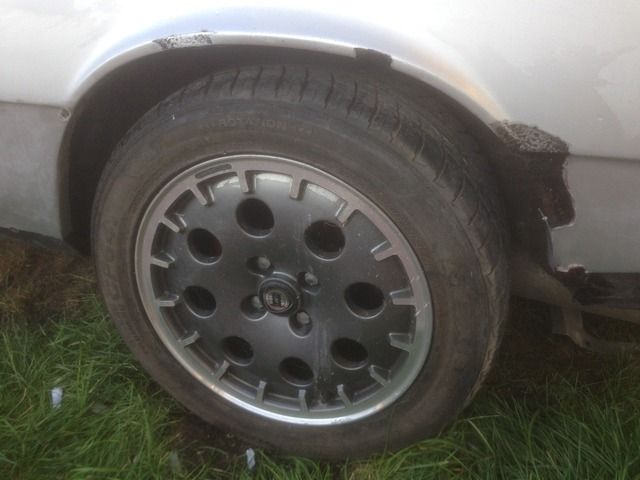
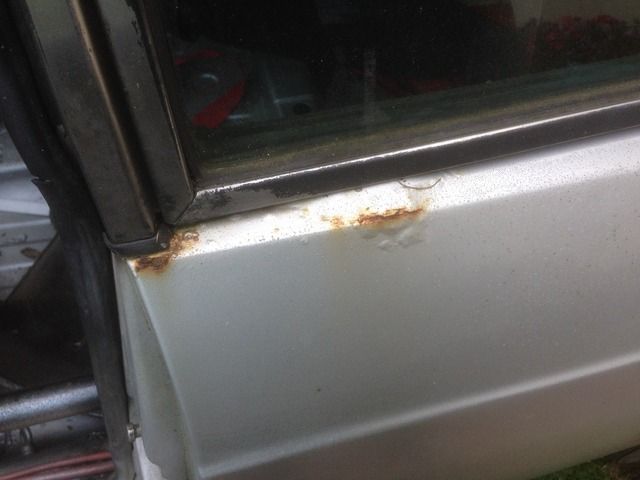
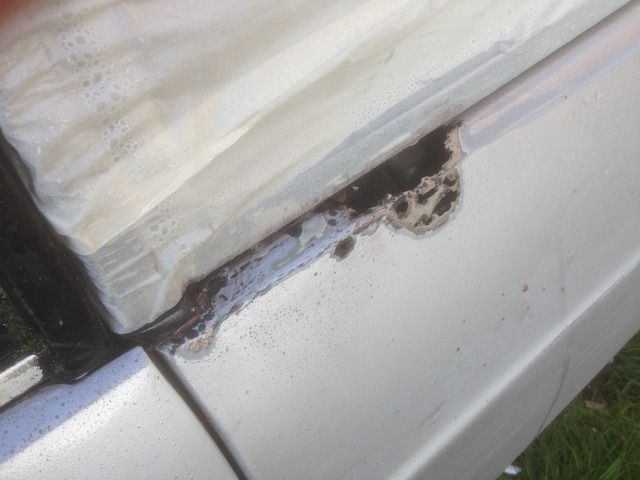
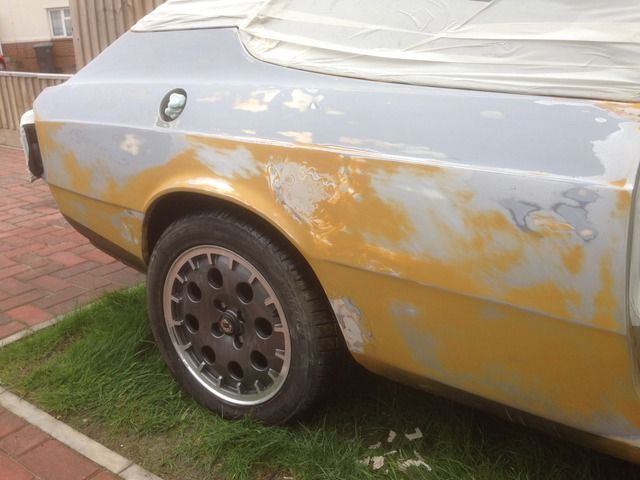
Onto thinking when would the brown holes end, I actually got a chance to start making it look pretty again (well try to)...
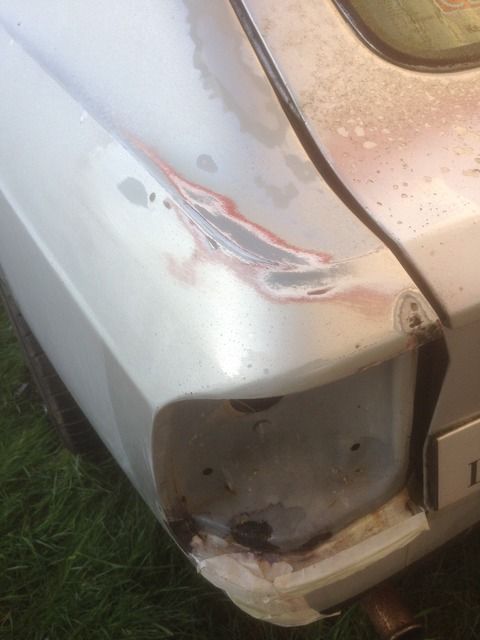
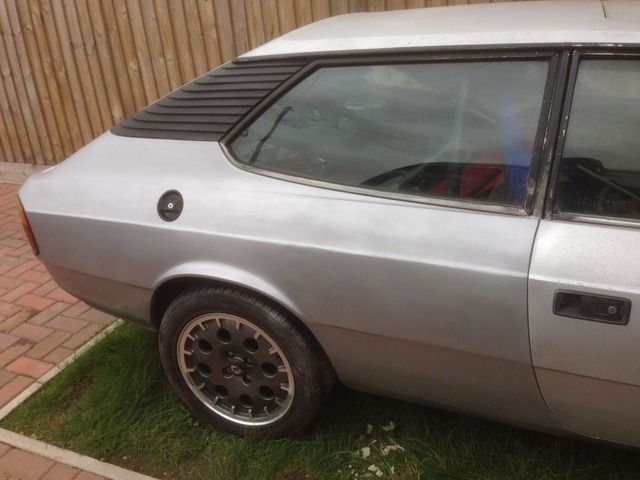
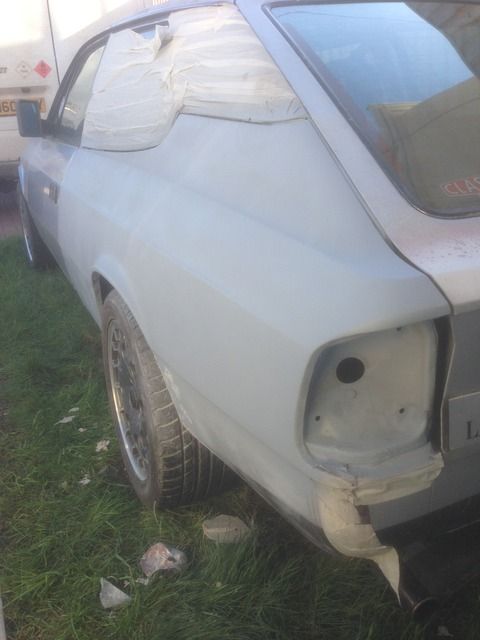
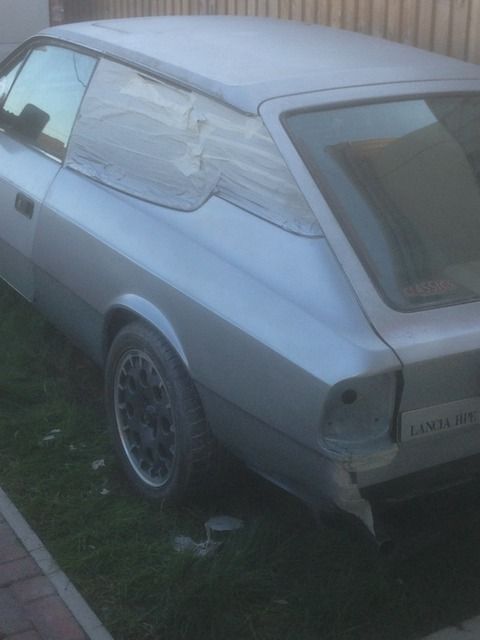
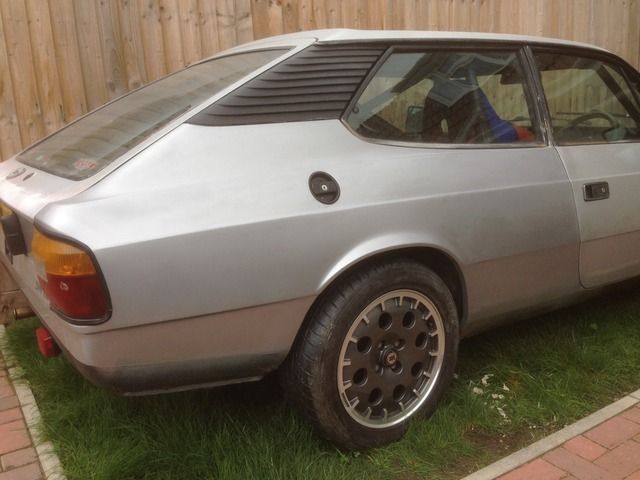
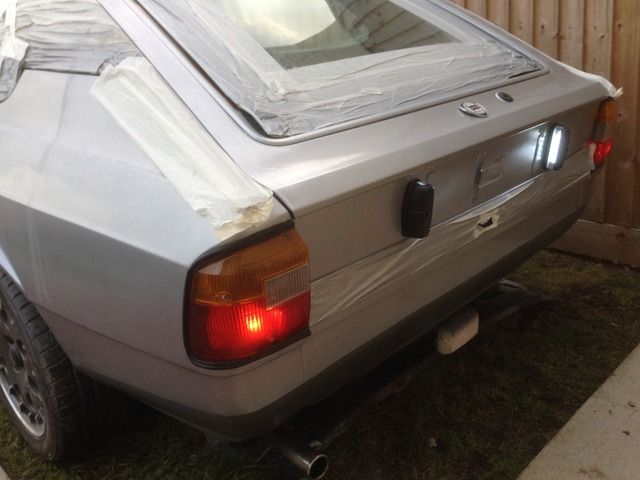
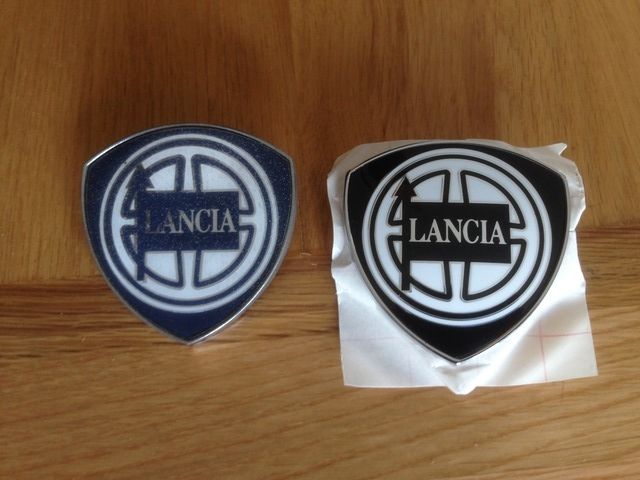
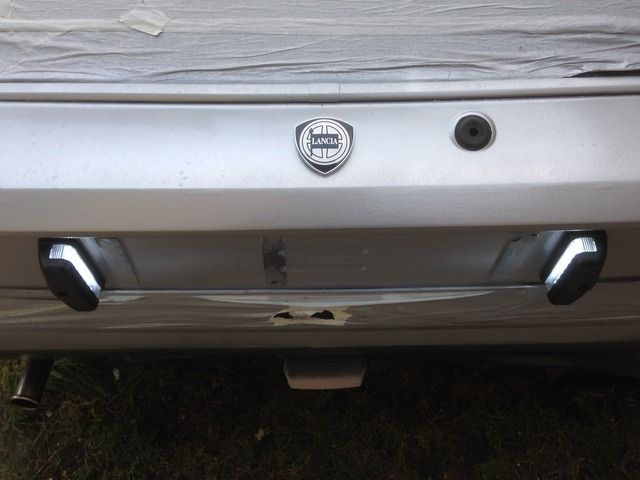
Was finding it hard to find a tailgate badge as the original had started to peel and fade, it's not concave like the original but the front badge of a delta/thema does just about fit and the pin locations are the same for fitting into the tailgate...
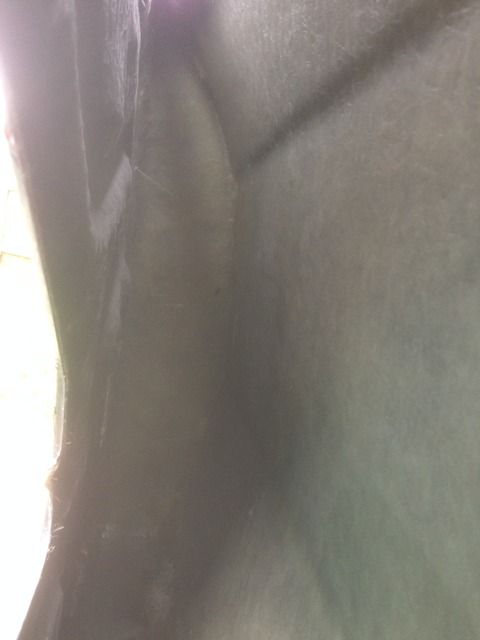
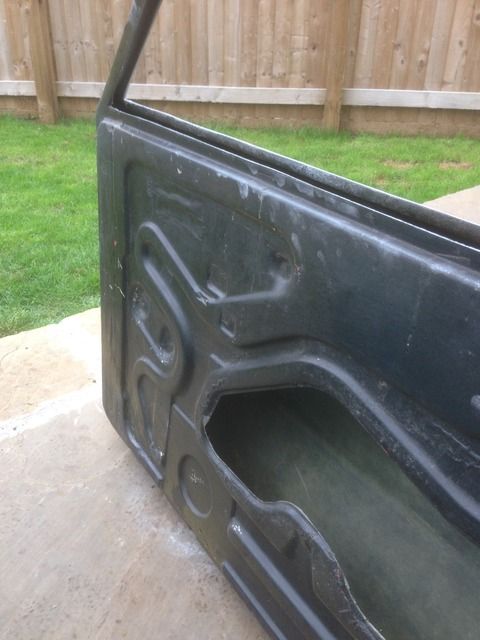
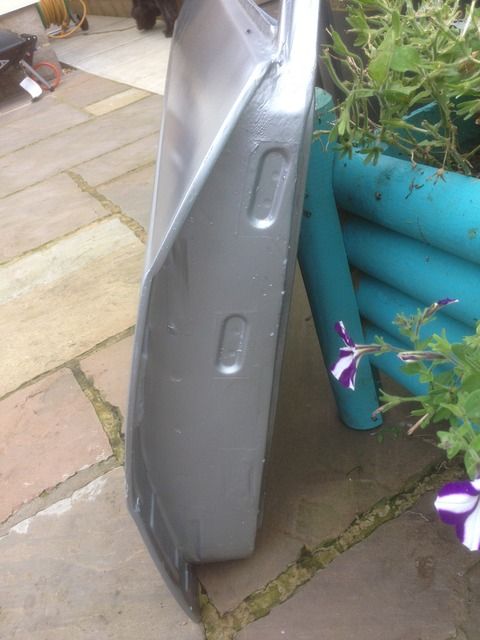
The bodywork side is pretty much done now, just the biggy of trying to get fibreglass doors to fit and work Undecided Smiley then hopefully it will at least all be the same shade of silver! I've started working on them, as they are really for the coupe the window frame is of a different profile so I will be cutting and shutting the top corner to extend the frame by whatevers needed...
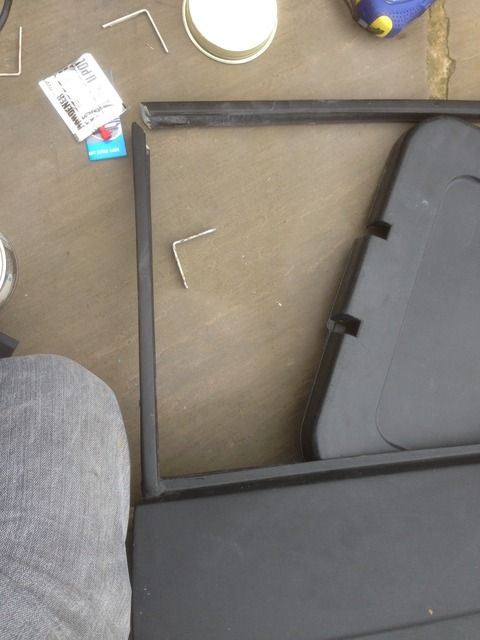
There's lots of little pieces to cut out and drill to make it even possible to mock it on the car, but my biggest issue is the mounting of the door to hinge, as you see there's no actual bracketry inside the door Roll Eyes ...


Lot's of masking later the window surrounds and gutters got some fresh black paint...
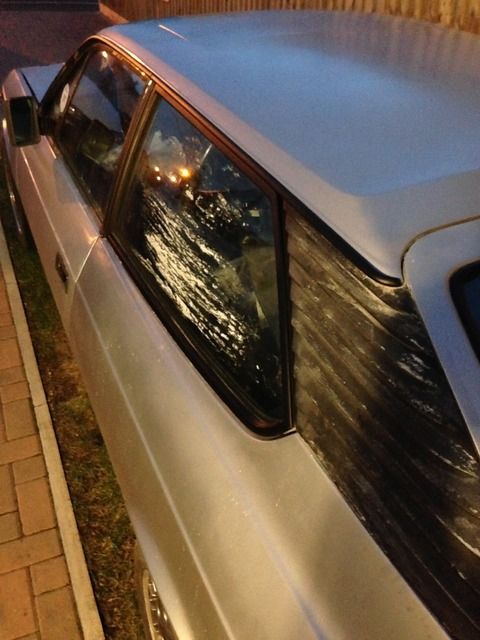
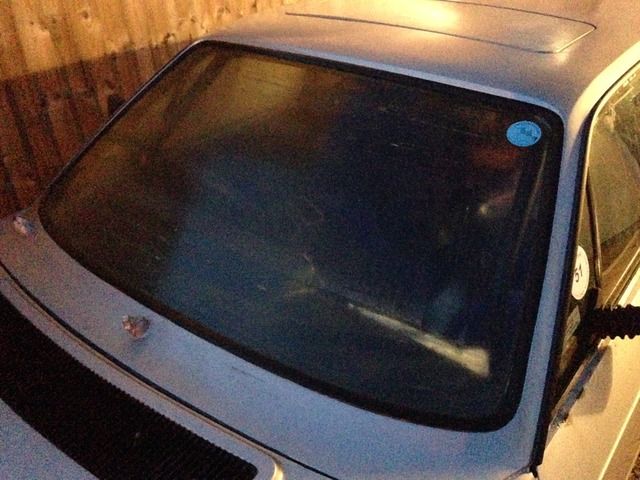
With the mot fast approaching, baring in mind i'd done about 30 miles with it since the last one, I couldn't believe that the chip that's been in the window ever since i've had the car (10 years) all of a sudden decided to crack a cm. It's never caused an issue as the wipers park pretty much on top of it and is just out of the mot failure area but with it's venture to crack, I tried some home repair resin you can buy from most stores, and for the price actually did quite a good job...
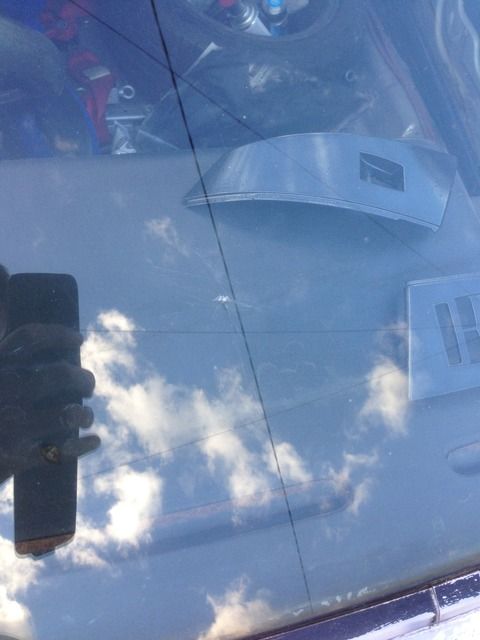
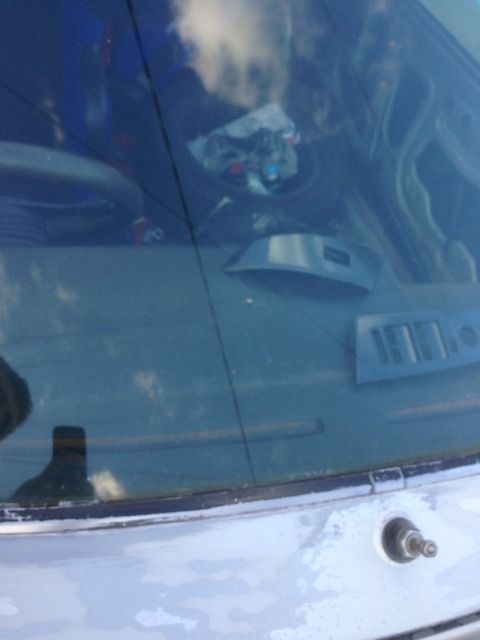
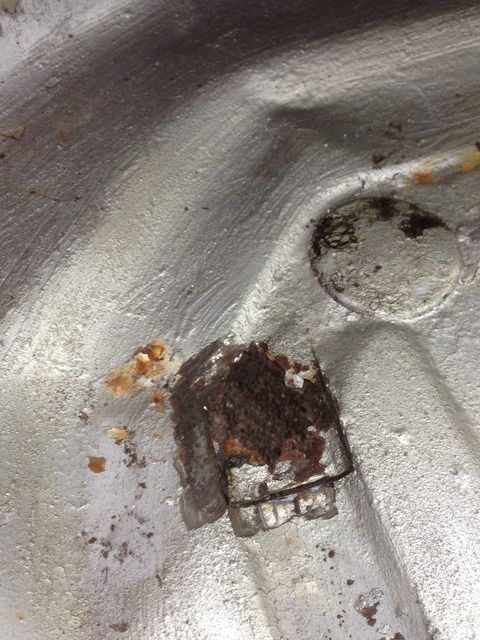
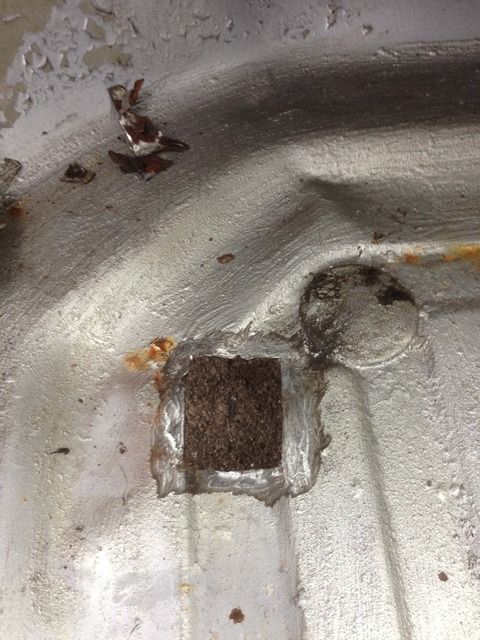
MOT in mind, the rubber bung in the passenger side floor had slight corrosion to the side of it, so to be on the safe side decided to cut it all out and weld in a piece for argument sake of corrosion next to a hole Cheesy...


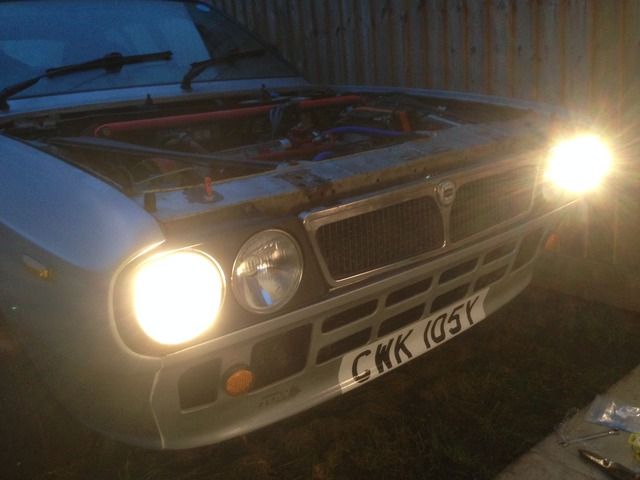
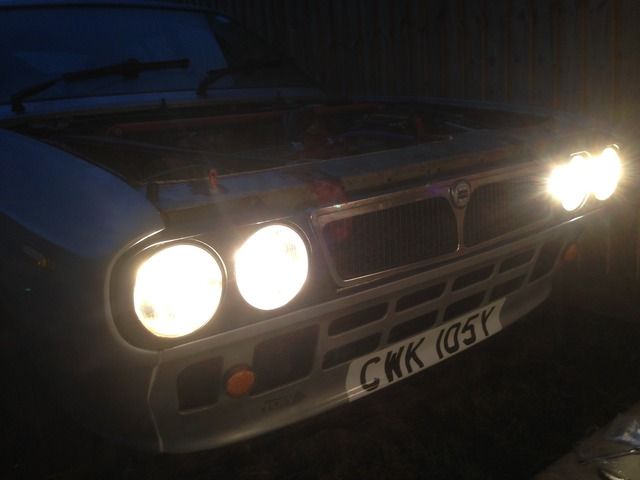
Sorting out the lighting and checking everything over, I came across an issue with resistance when the dipped beam were on affecting the power to the rear sidelights, to get around this i've fitted a relay and fresh wiring for the lights and WHAT Shocked a difference it made! Side lights, dipped and main beam...


Having bought a replacement coolant sensor and doing a coolant change ready for winter, I finally got the gauge working and was nice to see what part of the green actually represented as a number...
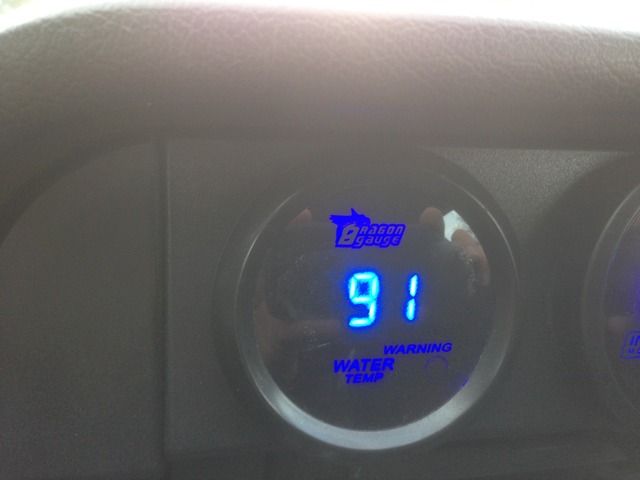
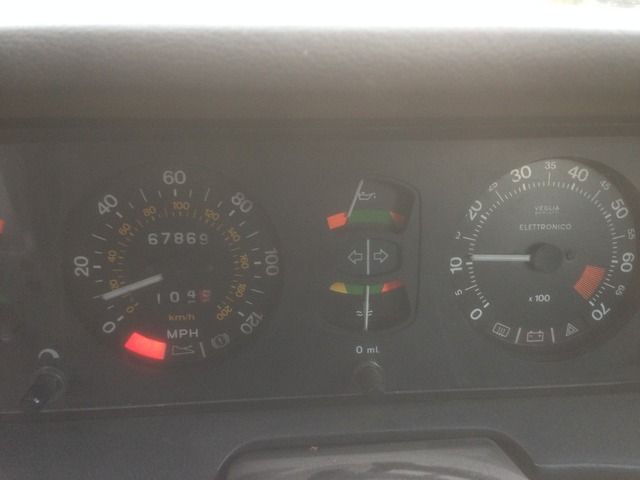
I took it for a spin and once up to temperature on the move at speed it doesn't want to go above around 72 degree's, pulled over to let it warm up before putting the twin fans on, and there dropping the temp by around a degree every 10-20 seconds, so the capability to keep things cool seems to be there.

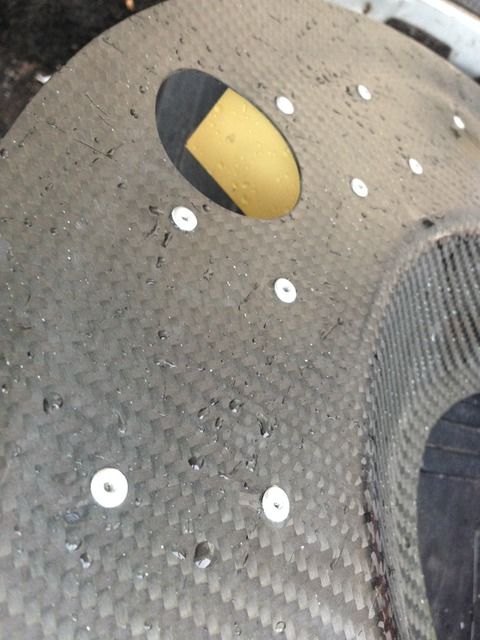
And finally, MOT passed Grin, one advisory of a track rod with some play which works out nicely as the tracking needed doing anyway! So was delighted with that, everything else got the thumbs up for another year, so hopefully i'll do a bit more mileage than last year Embarrassed Early xmas present to myself, the next project along side the doors, little teaser for you...


Logged

1982 - Lancia Beta HPE 2000ie http://www.betaboyz.myzen.co.uk/forum/index.php?topic=472.0
1989 - Lancia Delta 16v integrale
1992 - Lancia Thema 2.0 16v Turbo
2001 - Honda Civic Type R EP3
WestonE
Legendary Member
******
Offline Offline

United Kingdom United Kingdom

Posts: 1772


« Reply #205 on: November 15, 2016, 10:10:45 AM »

Great Inspiring work Marcus and I am intrigued by the carbon fibre puzzle.

Eric
Logged
lanciamad
http://www.flickr.com/photos/lanciamad
Hero Member
*****
Offline Offline

England England

Posts: 699


Marcus Robinson


« Reply #206 on: July 22, 2017, 12:29:58 PM »

I see photobucket have annoyingly changed their status on 3rd paty sharing, so on a dark winters night in the future I will have to recover the pics and update the links as I go, hopefully my flickr account will allow me to upload photo’s from now on….
Same old story, where does the time go?! But I will persist with back dating the blog to present, before my memory fails me.
My bit of carbon fibre takes shape as the brake air ducts which bolt onto the wheel in this case my 16v integrale wheels, as used by integrale’s and many other rally cars normally for tarmac stages…
IMG_8091 by Marcus Robinson, on Flickr

Weighing in at 380 grams each they weigh not much more than a wheel trim I would imagine…
IMG_8098 by Marcus Robinson, on Flickr

For show more than practically, I very much expect so! But I think it gives it a bit more aggressive look to the car and goes with the theme of what the car’s always been about, evolving over the years. I expect wheel arch extensions could be very much on the cards in the future to finish the look, but for now these are them fitted…
IMG_8097 by Marcus Robinson, on Flickr IMG_8096 by Marcus Robinson, on Flickr

Having cleared the parts and tools out of the back of it (you’ve still got to make use of it being an estate), I gave it a once over and a fresh paint over the floors, wheel arches and touched up a few area’s on the cage…
IMG_8126 by Marcus Robinson, on Flickr

Onto wiring, having already replaced the ignition barrel after it failed on the Norfolk beta meet (The last decent run the cars had), and although the second hand unit was functioning, the block connector was becoming troublesome, and the choice was to either replace or get rid of completely…
IMG_8134 by Marcus Robinson, on Flickr

I got rid of it completely… and then decided to get rid of the ignition barrel… and the next thing I know I’ve got wires everywhere and the cigarette lighter is no more as well…
IMG_8135 by Marcus Robinson, on Flickr

Cigarette lighter replaced by a push-button start with the override switch for the radiator fans and air-craft style ignition switch with fresh wiring and relays…
IMG_8141 by Marcus Robinson, on Flickr
IMG_8142 by Marcus Robinson, on Flickr

With the cigarette lighter removed, by chance the trio of cig lighter, usb dock and voltage gauge just happens to almost fit perfectly in the ash tray space, I’m yet to finalise the fitting but all wired up and working…
IMG_8234 by Marcus Robinson, on Flickr

With the temperature gauge now up and running, it was interesting to see what the original gauge actually represents as needle position – temperature…
IMG_8146 by Marcus Robinson, on Flickr
IMG_8147 by Marcus Robinson, on Flickr
IMG_8148 by Marcus Robinson, on Flickr
IMG_8149 by Marcus Robinson, on Flickr

Roll cage padding added to the cage, also becomes quite a comfortable headrest…
IMG_8160 by Marcus Robinson, on Flickr
IMG_8158 by Marcus Robinson, on Flickr

Having one of those I forgot I had that moments, I came across the better quality fuel pressure regulator than the cheap and cheerful one I first used. So it was off with the old original fuel rail I’d modified…
IMG_8187 by Marcus Robinson, on Flickr

And made a start on the mk2. First cutting the original pipework away from the rail…
IMG_8178 by Marcus Robinson, on Flickr

Then giving it a decent rub down, generous paint and mocked up fitting the regulator…
IMG_8179 by Marcus Robinson, on Flickr
IMG_8186 by Marcus Robinson, on Flickr

Fuel rail on, fitted a lot better with correctly sized length fuel hoses to injectors and fresh hose clips. Fuel pressure set from 2 bar to the 3 bar it needs, and it ran perfectly…
IMG_8189 by Marcus Robinson, on Flickr

Time running out, although I’ve kept the car going through Mot’s over the years, it had only done 80 or so miles since BetaMeeta 2012 in Norfolk, so a couple of days before this years event (BetaMeeta 17) I thought I better start putting some mileage on and run it for a decent amount of time. Circling the local area through villages and then braving the main roads everything ran as it should and the sticky brake pedal started to disappear more with use, hour and a half of running and 50ish miles, all good…
IMG_8154 by Marcus Robinson, on Flickr

Couple of days later, ready for the off…
IMG_8233 by Marcus Robinson, on Flickr

When your running a 4 branch through a straight through pipe out to the single original silencer cruising along the motorway with no sound proofing, there’s a lot of noise going on!...
DSC01675 by Marcus Robinson, on Flickr

The weather was on our side just 15 miles until we reached destination, and then while out and about was changeable…
DSC01611 by Marcus Robinson, on Flickr

Only issue of the whole journey for me, was one of the bonnet pins had decided to become loose, and just happened to be when out on the drive with the others while going along the motorway which wasn’t convenient. But we still managed to keep up without the fibreglass bonnet making an exit, quick tighten up and job done, must remember to Loctite them!…
DSC01620 by Marcus Robinson, on Flickr

A very enjoyable day, I could only make the Saturday of this years event, and completed 366.8 miles for the day without any running issues at all…
IMG_8236 by Marcus Robinson, on Flickr

My photo's of the event... https://www.flickr.com/photos/lanciamad/albums/72157683975630506

Logged

1982 - Lancia Beta HPE 2000ie http://www.betaboyz.myzen.co.uk/forum/index.php?topic=472.0
1989 - Lancia Delta 16v integrale
1992 - Lancia Thema 2.0 16v Turbo
2001 - Honda Civic Type R EP3
lanciamad
http://www.flickr.com/photos/lanciamad
Hero Member
*****
Offline Offline

England England

Posts: 699


Marcus Robinson


« Reply #207 on: August 16, 2017, 10:29:55 AM »

Ok, so I decided that enough was enough and the various bits and pieces for an engine build i'd collected over the years would only be any good if they were actually ever used than gathering dust and corrosion in the shed Undecided
Time frame for the build isn't much of a concern as the standard ie engine is still going well and continues to be bomb proof in the car, I could have made life easier by robbing what I need off the current engine for the new build but have decided to leave the car alone and build this completely separately, robbing some bits off a short block I bought from one of the montecarlo guys years ago which has just been sat outside since. Picture overload...
This is the chosen head of the three I came across...
IMG_8496 by Marcus Robinson, on Flickr
IMG_8498 by Marcus Robinson, on Flickr
Pair of camshafts from a 130tc, I maybe utilising the exhaust cam for the build...
IMG_8497 by Marcus Robinson, on Flickr
Exhaust manifold in place, you could see the amount of material that could be potentially removed...
IMG_8499 by Marcus Robinson, on Flickr
IMG_8501 by Marcus Robinson, on Flickr
So I did Cheesy ...
IMG_8502 by Marcus Robinson, on Flickr

I don't profess to knowing exactly what i'm doing nor recommend anything that I've done or are doing, but am purely going to do this engine build as another one of many projects that I will enjoy and experiment along the way than having any goals of achieving X amount of bhp. The goal is to of course get more bhp, but for what amount isn't something i'm affixed about; as long as it runs becomes reliable and gives the enjoyment of completing my first full engine build i'll be happy Smiley I have financial constraints to what I can personally afford to this, so in some cases parts have been sourced at cost, but to balance it off, as much of the work and build that can be realistically completed from the driveway, will be. The Haynes manual, guy crofts book and help from members will be my best friend along the way, especially Eric that has been great with info. and has already been there before with what works and doesn't, so thank you.

Having got quotes to do various bits, I thought with nothing to lose I would go about porting and polishing myself, if I was to buy anything from Guy then savings had to be made somewhere! The dremel hasn't seen much action, so about time it paid it's way. Crudely the ports were opened up to be as consistent as possible and then sanding smooth over and over...
IMG_8506 by Marcus Robinson, on Flickr
Below is the result of halfway through smoothing off everything, the more you dig the more the imperfections show...
IMG_8507 by Marcus Robinson, on Flickr
Even the dog wanted a go...
IMG_8539 by Marcus Robinson, on Flickr
Onto removing valves, very dry rusty valves. Having bought a spring compressor a while back, what ever was tried it didn't seem to want to know, until I remembered an old relic I had, and using the classic they don't make them like they used to they all came out reasonably easily...
IMG_8526 by Marcus Robinson, on Flickr
Exhaust side out...
IMG_8515 by Marcus Robinson, on Flickr
All out...
IMG_8516 by Marcus Robinson, on Flickr
Valves out, the true amount of corrosion and carbon deposits can be seen...
IMG_8517 by Marcus Robinson, on Flickr
Valves removed and measured, exhaust...
IMG_8518 by Marcus Robinson, on Flickr
Intake...
IMG_8519 by Marcus Robinson, on Flickr
To be replaced by, exhaust...
IMG_8521 by Marcus Robinson, on Flickr
Intake...
IMG_8520 by Marcus Robinson, on Flickr
These valves I bought many a year ago, thankfully in good new condition and have stayed that way. I think the plan for 2018 will be to source a VX head which Alan might be helping me out with and then utilising the bigger, I think 44mm intake and sodium cooled exhaust valves, but for now i'm going to go with what I've got which should give a fair improvement.
Removing studs...
IMG_8522 by Marcus Robinson, on Flickr
Who would ever believe I can be organised when I want to, not that I will be using much of the old but you never know...
IMG_8525 by Marcus Robinson, on Flickr
Initial cleaning of port before and after...
IMG_8542 by Marcus Robinson, on Flickr
IMG_8543 by Marcus Robinson, on Flickr
and more...
IMG_8545 by Marcus Robinson, on Flickr
IMG_8546 by Marcus Robinson, on Flickr
Exhaust port comparison, the guides are yet to come out and final polishing to be completed but you get what i'm aiming for...
IMG_8550 by Marcus Robinson, on Flickr


Logged

1982 - Lancia Beta HPE 2000ie http://www.betaboyz.myzen.co.uk/forum/index.php?topic=472.0
1989 - Lancia Delta 16v integrale
1992 - Lancia Thema 2.0 16v Turbo
2001 - Honda Civic Type R EP3
peteracs
Administrator
Legendary Member
******
Offline Offline

United Kingdom United Kingdom

Posts: 4017


Peter Stokes


« Reply #208 on: August 16, 2017, 10:57:44 AM »

Hi Marcus

On the subject of porting, have you ever read any books of or seen any videos by David Vizard?

If not well worth reading and viewing. One nugget was in a video where he talks about some testing of K & N filters and the conclusion he came to why they worked so well, I can dig out the link if anyone is interested (it was part of a recorded lecture in Oz if I remember correctly)

Peter
Logged

Beta Spyder S2 pre F/L 1600
Beta HPE S2 pre F/L 1600
lanciamad
http://www.flickr.com/photos/lanciamad
Hero Member
*****
Offline Offline

England England

Posts: 699


Marcus Robinson


« Reply #209 on: August 18, 2017, 11:07:36 AM »

Hi Marcus

On the subject of porting, have you ever read any books of or seen any videos by David Vizard?

If not well worth reading and viewing. One nugget was in a video where he talks about some testing of K & N filters and the conclusion he came to why they worked so well, I can dig out the link if anyone is interested (it was part of a recorded lecture in Oz if I remember correctly)

Peter

Hi Peter,
I hadn't, some very interesting opinions. Having watched a bit on youtube, coating intake valves is an interesting thought, he also mentions using a 80 grit to finish, I've gone with 180 so far, you could probably go higher for the exhaust side but different engines behave a bit differently and a bit of turbulent air is not always a bad thing on induction so I've been told, so i'll probably leave it there.
More picture overload...
This is the block i'm hoping to use for the engine build, previous owner stripped it down, had it bored to fit 84.6mm pistons and then never got around to putting it back in. It's been in the shed for getting on for 9-10 years, so has gained outer surface rust but had been painted a light blue colour which has kept it reasonable. The top of the block I will have skimmed, for peace of mind I will probably remove the core plugs and fit new as they seem to be prone to rusting from inside out unless I can physically see there condition and will strip all components to degrease and clean. I have managed to turn the crank and the bore conditions still look to be good, so hopefully a light hone will only be required fingers crossed; the previous guy said that the bearings were changed at the time of the build so hoping that crank and bearings will be in good condition, although I expect with the rods i'll be using I may need to buy new integrale bearings anyway...
IMG_8569 by Marcus Robinson, on Flickr
IMG_8574 by Marcus Robinson, on Flickr
IMG_8573 by Marcus Robinson, on Flickr
IMG_8575 by Marcus Robinson, on Flickr
IMG_8578 by Marcus Robinson, on Flickr
IMG_8638 by Marcus Robinson, on Flickr
Onto shiny things, it's taken a little while to decide on how far to go, where to source parts and what was affordable, so from a mix match of sources I've come up with the following; with some of it coming from our friends in the US with all the import taxes on top of shipping etc I went with one mass order...
Rear water plate...
IMG_8581 by Marcus Robinson, on Flickr
My colour scheme is going to be red and black eventually for the engine, so sticking to the red theme, auxiliary pulley...
IMG_8582 by Marcus Robinson, on Flickr
IMG_8583 by Marcus Robinson, on Flickr
New bronze valve guides...
IMG_8584 by Marcus Robinson, on Flickr
Adjustable camshaft pulleys...
IMG_8585 by Marcus Robinson, on Flickr
Auxiliary shaft with apparently no lobe for fuel pump, which may prevent it playing with the conrod if ever mis-timed...
IMG_8586 by Marcus Robinson, on Flickr
Crankshaft timing belt gear...
IMG_8587 by Marcus Robinson, on Flickr
IMG_8588 by Marcus Robinson, on Flickr
High compression pistons, 84.6mm...
IMG_8590 by Marcus Robinson, on Flickr
IMG_8591 by Marcus Robinson, on Flickr
Fuel pump block off plate...
IMG_8592 by Marcus Robinson, on Flickr
When the engine is swapped, I will give the engine bay a good tidy up and paint, so some new grounding pods won't hurt...
IMG_8593 by Marcus Robinson, on Flickr
Crank breather hoses...
IMG_8594 by Marcus Robinson, on Flickr
Plug for oil pump / distributor...
IMG_8595 by Marcus Robinson, on Flickr
Timing belt and bearing...
IMG_8596 by Marcus Robinson, on Flickr
Flywheel bolts...
IMG_8598 by Marcus Robinson, on Flickr
I need to mount the EDIS ignition better than it is now, so will probably make use of some exhaust mounts somehow to help with vibration and keep it directly off the engine as it is now...
IMG_8599 by Marcus Robinson, on Flickr
Cylinder head studs...
IMG_8600 by Marcus Robinson, on Flickr
Engine gasket set, notice the missing cam box gasket Sad luckily I've got a gasket set for a head kicking about so I can pick and choose with what to use...
IMG_8601 by Marcus Robinson, on Flickr
Sump gasket...
IMG_8602 by Marcus Robinson, on Flickr
and another...
IMG_8604 by Marcus Robinson, on Flickr
In the confusion they must have sent two sump gaskets without sending two cam box gaskets, notice there's differences between them...
IMG_8605 by Marcus Robinson, on Flickr
Logged

1982 - Lancia Beta HPE 2000ie http://www.betaboyz.myzen.co.uk/forum/index.php?topic=472.0
1989 - Lancia Delta 16v integrale
1992 - Lancia Thema 2.0 16v Turbo
2001 - Honda Civic Type R EP3
lanciamad
http://www.flickr.com/photos/lanciamad
Hero Member
*****
Offline Offline

England England

Posts: 699


Marcus Robinson


« Reply #210 on: August 18, 2017, 12:09:48 PM »

Less shiny stuff, having read and been told that the vx flywheel with a thema/integrale clutch is the best option to cope with more power (I can hope) cheaply, right time and place, half an hour up the road one became available, same old story he had planned to do a locost single seater project and it was a few of the parts he had left that never made it to the car/project 10+ years ago...
IMG_8610 by Marcus Robinson, on Flickr
IMG_8609 by Marcus Robinson, on Flickr
Back to the head, the intake side didn't warrant too much material being taken away...
IMG_8614 by Marcus Robinson, on Flickr
I've just been concentrating on tidying it all up and smoothing out the short turn radius...
IMG_8618 by Marcus Robinson, on Flickr
Combustion chamber tidy up...
IMG_8621 by Marcus Robinson, on Flickr
IMG_8622 by Marcus Robinson, on Flickr
Did a bit of blending to the combustion chamber, just to remove any potential hot spots but wanted to do the bear minimum as anything removed would lower the compression ratio...
IMG_8623 by Marcus Robinson, on Flickr
and cleaned up a bit...
IMG_8624 by Marcus Robinson, on Flickr
Like I said, i'm no professional Cheesy but it's been fun 'having a go' I can only hope for some improvement from what came out the factory and has had 35 years worth of wear and tear. A very poorly advertised clutch came up which had been fitted and then removed as it was the wrong item for them, luckily for me as a bit of a punt I picked it up and it was what I was after, 228mm thema clutch...
IMG_8636 by Marcus Robinson, on Flickr
IMG_8626 by Marcus Robinson, on Flickr
Took some cleaning of the location lugs...
IMG_8625 by Marcus Robinson, on Flickr
and then fits like a glove...
IMG_8628 by Marcus Robinson, on Flickr
Onto the man which is a god when it comes to these engine's, I ordered Guy crofts 3a inlet camshaft that should work quite well with a 130tc exhaust cam Grin 1mm top hats also...
IMG_8630 by Marcus Robinson, on Flickr
IMG_8629 by Marcus Robinson, on Flickr
IMG_8631 by Marcus Robinson, on Flickr
IMG_8632 by Marcus Robinson, on Flickr
I'm yet to tap all the holes on the head but have got round to doing all the spark plug holes and thought that I may have had to helicoil the spark plug hole for 4, but having tapped all of them it seems to have come up pretty good...
IMG_8674 by Marcus Robinson, on Flickr
When porting and polishing, time isn't money when you do it yourself, but I think i'm pretty happy with it now...
IMG_8676 by Marcus Robinson, on Flickr
IMG_8677 by Marcus Robinson, on Flickr
IMG_8678 by Marcus Robinson, on Flickr
Deciding on what to do again, at the end of the day, years down the line I will probably muck around with changing heads, for bigger/better etc but would rather have the bottom end done and dusted for a very long time, so with the block work soon to be going on I've bought some new forged conrod's which should do nicely once I decide what bearings I need for the crank and will feature an oil spray mod to them before being fitted...
IMG_8655 by Marcus Robinson, on Flickr
IMG_8658 by Marcus Robinson, on Flickr
IMG_8657 by Marcus Robinson, on Flickr
IMG_8659 by Marcus Robinson, on Flickr
A few other bits once it get's really serious and things get taken out and put in, new power steering and alternator belts...
IMG_8680 by Marcus Robinson, on Flickr
Water pump...
IMG_8681 by Marcus Robinson, on Flickr
Water sensors for cylinder head...
IMG_8682 by Marcus Robinson, on Flickr
All important sticker...
IMG_8683 by Marcus Robinson, on Flickr
Baffled sump kit courtesy of the betaboyz to keep the oil where the oil should be, and will also be complemented by an Accusump setup that should protect the engine from whatever G I throw at it as well as initial start up wear...
IMG_8684 by Marcus Robinson, on Flickr
Onto sunday, off to retro rides  Smiley
Logged

1982 - Lancia Beta HPE 2000ie http://www.betaboyz.myzen.co.uk/forum/index.php?topic=472.0
1989 - Lancia Delta 16v integrale
1992 - Lancia Thema 2.0 16v Turbo
2001 - Honda Civic Type R EP3
rachaeljf
Full Member
***
Offline Offline

Posts: 85


« Reply #211 on: August 27, 2017, 06:51:03 PM »

I'm interested that you have Maxpeeding rods. Are there any milling marks on the inside of the flutes?
Logged
Pages: 1 ... 9 10 [11]
  Print  
 
Jump to:  

Powered by MySQL Powered by PHP Powered by SMF 1.1.21 | SMF © 2015, Simple Machines
SMFAds for Free Forums
Valid XHTML 1.0! Valid CSS!