J3SHF
Jr. Member
 
 Offline Offline
 United Kingdom
Posts: 30
|
 |
« Reply #140 on: April 15, 2013, 06:54:23 PM » |
|
The HF Turbo wheels were only 14" and the Integrale's were 15", should help work out what you have.
|
|
|
|
|
 Logged
|
|
|
|
|
HFStuart
|
 |
« Reply #141 on: April 15, 2013, 06:54:54 PM » |
|
Chas,
Integrale wheels were 15" 6" wide on the 8V and 7" on 16V, Delta HFie wheels were 14"
|
|
|
|
|
 Logged
|
|
|
|
J3SHF
Jr. Member
 
 Offline Offline
 United Kingdom
Posts: 30
|
 |
« Reply #142 on: April 15, 2013, 06:57:36 PM » |
|
Beat you to it by 25 seconds lol
|
|
|
|
|
 Logged
|
|
|
|
|
VXdeMayo
|
 |
« Reply #143 on: April 15, 2013, 08:07:41 PM » |
|
Cheers Guys, it looks like I have got a set of HF Turbo's rather than Integrale. Still would like to know about the diamond cutting though! Best, Chas.  |
|
|
|
|
 Logged
|
"Baldric - I have a cunning plan" (Oh - ah, maybe not)!
|
|
|
|
MattNoVAT
|
 |
« Reply #144 on: April 15, 2013, 09:01:39 PM » |
|
Although diamond cut wheels looks great, I found them to be a pain, as you regularly have to clean them & protect them with something like Poorboys sealant/polish.
I had diamond cut alloys on my M3 and Lepsons advised that they could only be cut twice, then you throw the rim away as you start to compromise the strength in the alloy. Eventually I took them off and sold them before the finish got kerbed, dinged, scratched or blemished thus meaning another trip to Lepsons and circa £115 per alloy!
Maybe for a show car then yes, I'd say it's possibly worth it, but not for a car thats driven regularly.
|
|
|
|
|
 Logged
|
1981 2000 Coupe S2/FL
1976 1600 Coupe S1
2007 Ypsilon 1.3 Bi-Colori
|
|
|
lanciamad
http://www.flickr.com/photos/lanciamad
Hero Member
    
 Offline Offline
 England
Posts: 699
Marcus Robinson
|
 |
« Reply #145 on: April 15, 2013, 09:15:39 PM » |
|
Hi Chas, Sounds like you have HF Turbo wheels if there silver, although I have seen integrale wheels for sale that have been previously painted. If you have a look at the size that will explain all. I've got a feeling the 14" wheel may fit straight on without the need for spacers, I needed to fit spacers and get longer wheel bolts for the 16v integrale wheels. These are HF Turbo alloys...  This is the first HPE I saw with the wheels, thought they looked good so became a copycat  ... 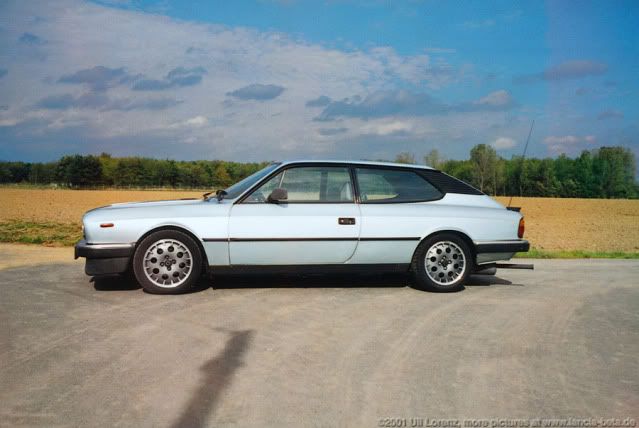 The turbo wheels do differ a bit to the integrale one's and the diamond cut process is needed for the machined and polished look to the rim. I'm not quite sure of the process, but I do know that my donor wheels had reasonably bad kerb damage, so presume the rim is cut back as far as needed to remove damage. Expensive but happy with the result. A simple tip I was told when I collected them, if your getting someone else to fit tyres to your refurbished wheels, make sure you cover the rim generously with masking tape, so that it gives some protection to the rim when fitting the tyre. Marcus. |
|
|
|
|
 Logged
|
|
|
|
J3SHF
Jr. Member
 
 Offline Offline
 United Kingdom
Posts: 30
|
 |
« Reply #146 on: April 15, 2013, 09:23:32 PM » |
|
They do suit the car very nicely, gives it a bit of an "037" look
|
|
|
|
|
 Logged
|
|
|
|
|
VXdeMayo
|
 |
« Reply #147 on: April 16, 2013, 09:59:37 AM » |
|
Dear Marcus, Thanks for the info and pics. The HF Turbo wheels you show are very like the ones I have got, however the webs around the rim circumference come up to the outer flat edge but curve down to the center rather than have a defined line. (If that makes any sense). That curve would make masking for the inner darker colour very difficult as there is no defined "edge". I wonder if I have a varient that is just usually painted one colour? I will try to post a pic to explain later. BTW: It must be tough living with the "037 look!" Will get back with a pic. Are you going to Bristol this weekend If so, see you there. Best, Chas and Anne.  |
|
|
|
|
 Logged
|
"Baldric - I have a cunning plan" (Oh - ah, maybe not)!
|
|
|
lanciamad
http://www.flickr.com/photos/lanciamad
Hero Member
    
 Offline Offline
 England
Posts: 699
Marcus Robinson
|
 |
« Reply #148 on: April 18, 2013, 09:53:56 PM » |
|
BTW: It must be tough living with the "037 look!"
It's very hard  Yeh if you can, post a pic up of the wheels you've got and we should be able to work out where they came from. Not sure if the 4wd differed from the turbo wheels or not. I'll probably be at Bristol in the morning for a couple of hours, see you there. |
|
|
|
|
 Logged
|
|
|
|
J3SHF
Jr. Member
 
 Offline Offline
 United Kingdom
Posts: 30
|
 |
« Reply #149 on: April 18, 2013, 09:59:46 PM » |
|
HF Turbo ie wheels and the HF 4WD wheels are the same, it was only the carb fed Early HF turbos that differed and had the same wheels as a Prisma.
|
|
|
|
|
 Logged
|
|
|
|
|
VXdeMayo
|
 |
« Reply #150 on: April 29, 2013, 08:55:31 PM » |
|
Dear Marcus, Here as promised are a couple of photos of my Lancia Cromodoras. You are right they are 14" (and I suspect 5 1/2J width). However you will see the difference in the "web" compared to 15" Integrales', and this will cause a problem if I wish to go the two tone colour option. Any thoughts? PS: Missed you at Bristol, however I saw your photos. Nice. Best, Chas.  |
|
|
|
 Logged
|
"Baldric - I have a cunning plan" (Oh - ah, maybe not)!
|
|
|
lanciamad
http://www.flickr.com/photos/lanciamad
Hero Member
    
 Offline Offline
 England
Posts: 699
Marcus Robinson
|
 |
« Reply #151 on: April 29, 2013, 10:00:27 PM » |
|
Hi Chas,
Yeh these are HF Turbo wheels, I see what you mean about the "web", never paid much attention to it in comparison but I see what you mean now. I would have thought you could quite easily have the two tone option without touching the "webs", but if you wanted the webs cut like the rim i'm not sure if they could do it, but expect its quite possible as I would have thought they would still use the same process as Integrale wheels.
I kept an eye out for people but it was only a passing visit and I think everyone else was looking round the show by the time I got up towards the fiat's/lancia's.
Marcus.
|
|
|
|
|
 Logged
|
|
|
|
lanciamad
http://www.flickr.com/photos/lanciamad
Hero Member
    
 Offline Offline
 England
Posts: 699
Marcus Robinson
|
 |
« Reply #152 on: May 04, 2013, 09:12:56 PM » |
|
The micro-blistered paintwork aside, the few rust spots around the car were starting to bug me, so i've made a start on making things a bit tidier bearing in mind the whole car will need to be rubbed down and have a full respray at sometime in the future. This crack in the rear quarter panel was of great annoyance... 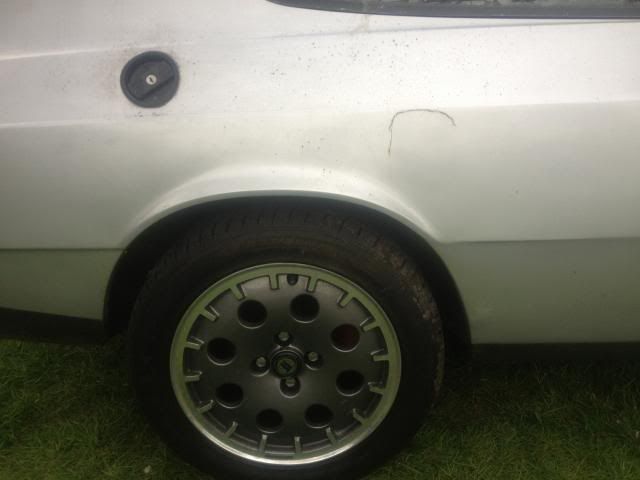 Quite an area of filler was needed to straighten out the damage to the panel before I got the car... 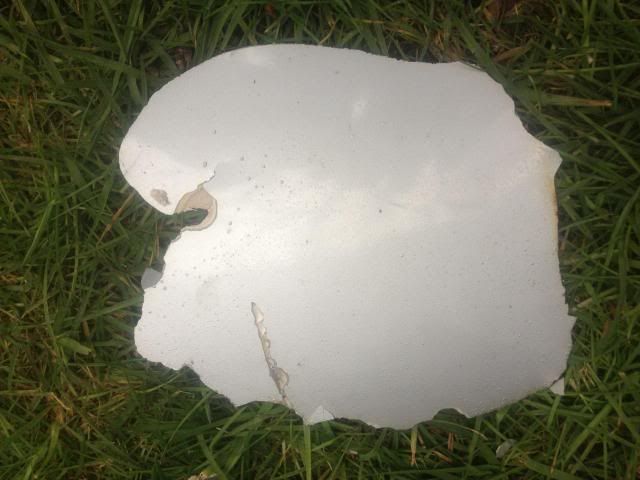 Told you... 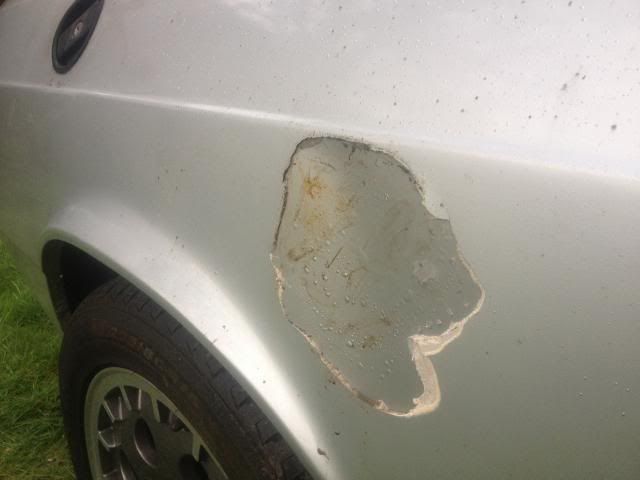 Some bubbles on the offside front wing soon turned into holes... 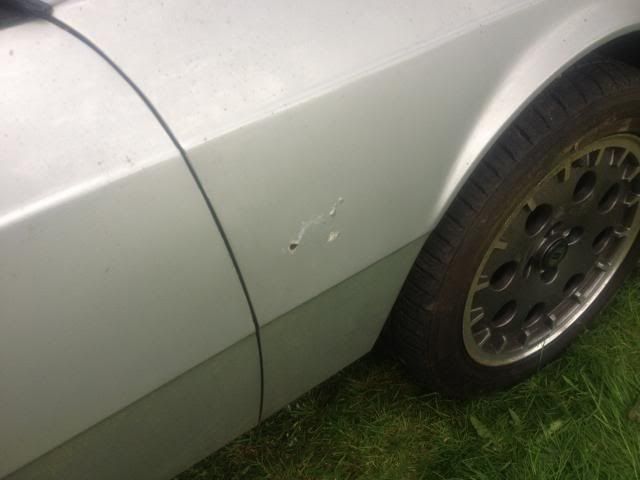 Top of rear quarter panel... 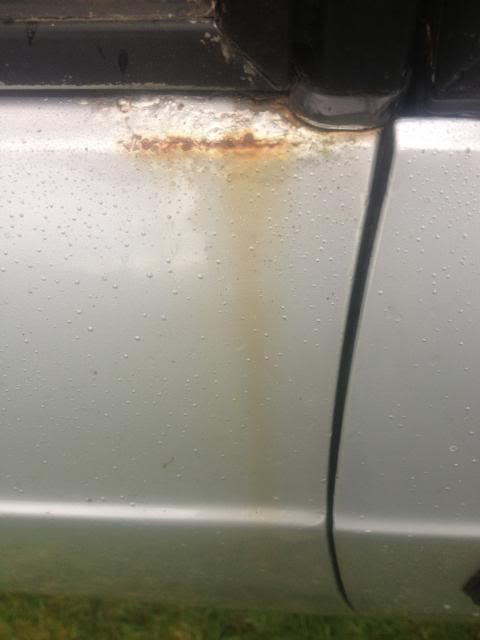 Some more filler / fibreglass work rubbed down... 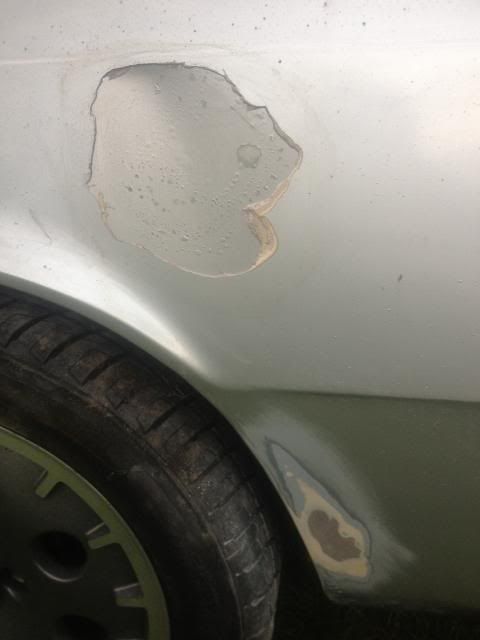 Bit smoother... 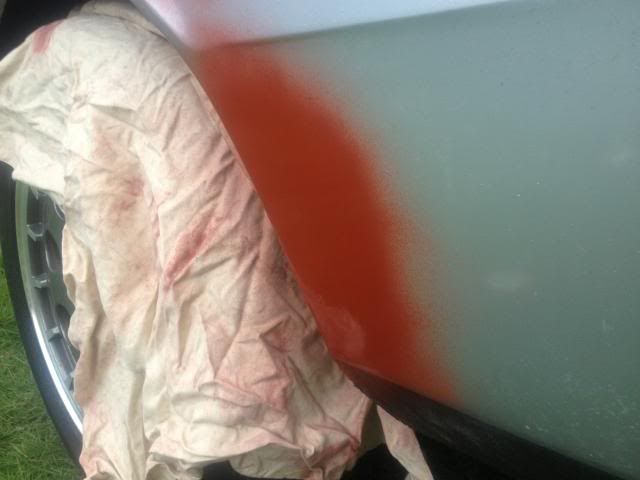 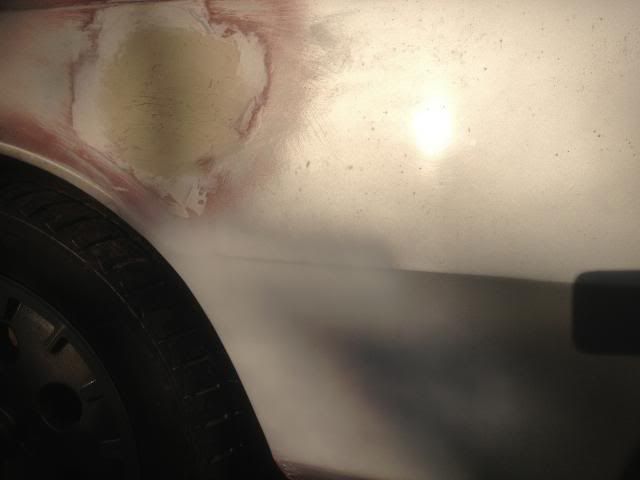 Split on the bonnet... 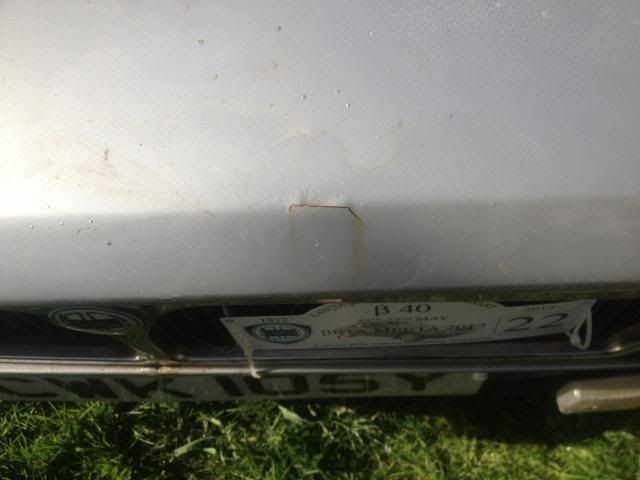 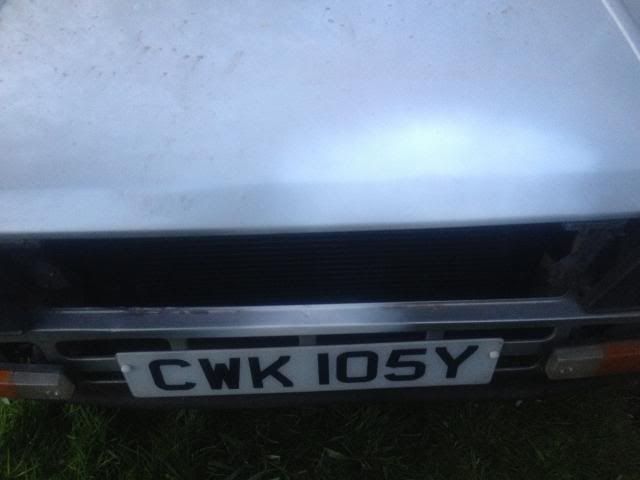 Front wing ready for final coats of primer, i'm not overly fussed about the front wings and valance as I've got fibreglass wings to go on when the respray happens along with the series 1 valance to fit... 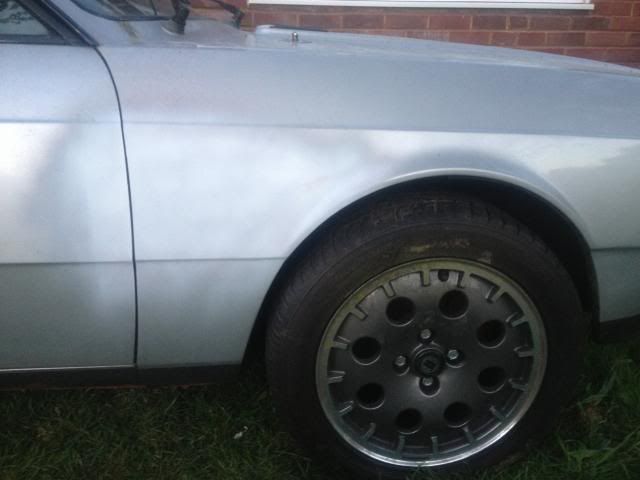 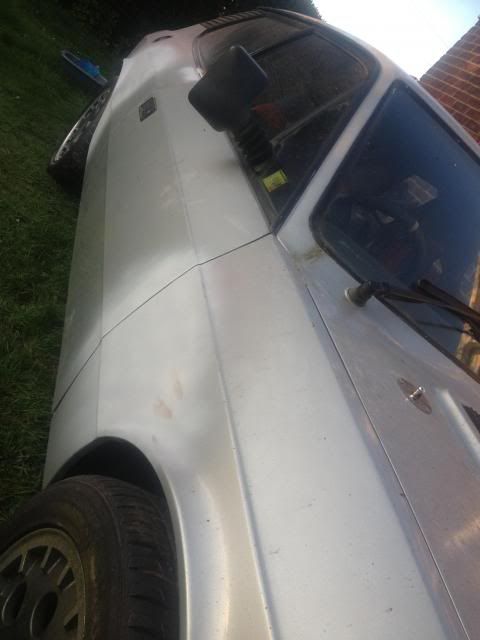 Replaced the aero wipers with some others as the rubbers had gone... 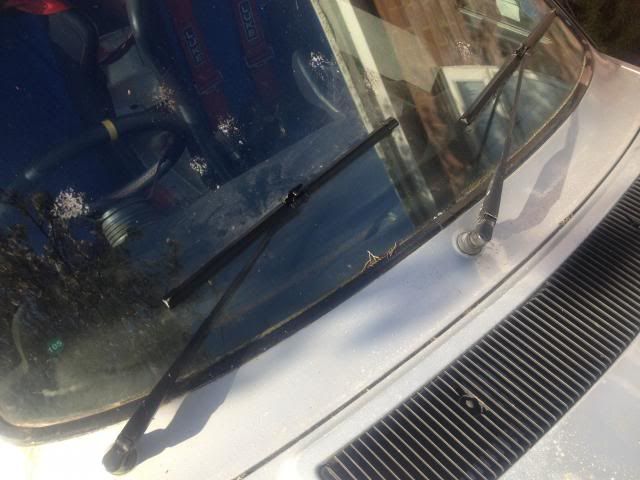 Was reasonably easy to get them to fit, the pins will be getting cleaned up and sprayed black sometime... 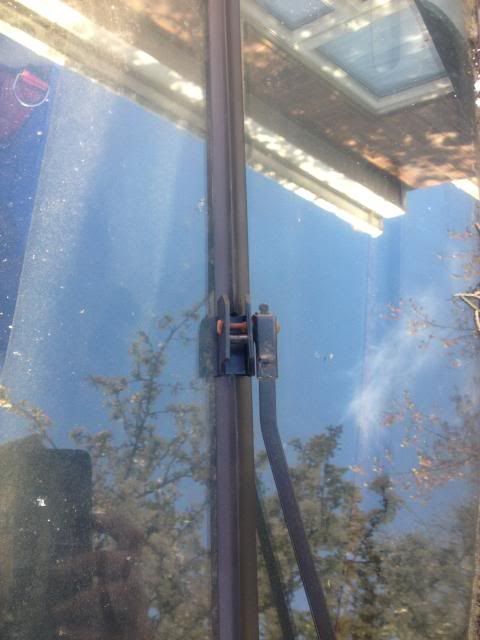 |
|
|
|
|
 Logged
|
|
|
|
|
Neil-yaj396
|
 |
« Reply #153 on: May 05, 2013, 08:17:27 AM » |
|
Should the dent above the OS rear wheel be pulled/pushed out? It wouldn't need so much filler then.
|
|
|
|
|
 Logged
|
|
|
|
lanciamad
http://www.flickr.com/photos/lanciamad
Hero Member
    
 Offline Offline
 England
Posts: 699
Marcus Robinson
|
 |
« Reply #154 on: October 06, 2013, 10:14:13 AM » |
|
The panel unfortunately was severely creased in from a side impact in it's past, that rippled it from just above the sill to just below the window. When it had a restoration and re-spray back probably 5-6 years ago now, the bodyshop said that was the best they could make it, having to fill what was left. I expect any further panel beating would probably distort the panel now, so will have to make do. Having limited funds and time to do anything with the car, i've taken a slightly different approach to sorting out the bodywork with the cost of a respray etc; and have decided to be a bit bold and different  The plan is to now rub down the offending micro-blistering, treating the minimal rust areas, giving everything generous coats of primer and then vinyl wrapping the car front to back in 4d carbon fibre myself with a few helping hands; looking at a max cost of around £150 hopefully. Once the first batch of vinyl turned up I dug the fibreglass wings out, which had generally held out well, had to fill a few imperfections from manufacture but were ready to go after an hours work... 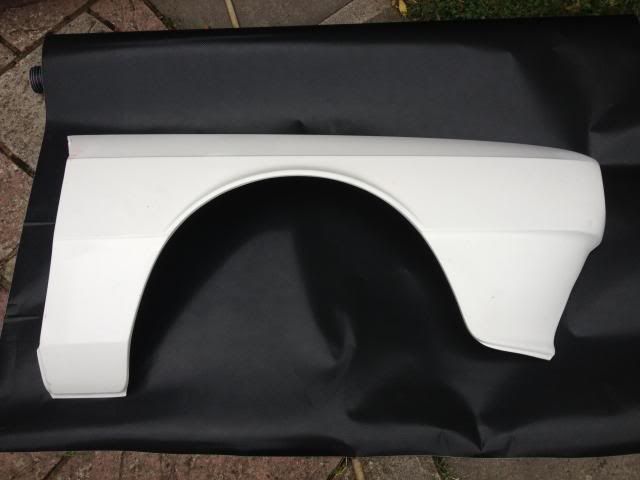 Starting with the nearside front wing, I gave it ago at wrapping it all in one piece, which was an interesting challenge! Looking at the shape of the panels, this is probably the worst to start with having to negotiate wrapping it around the wheel arch and the front of the panel bearing in mind it all started off as just a rectangle of vinyl. I'm generally happy with the first attempt, i'm not going to pretend its an immaculate job, but you would need to look for the slight imperfections which aren't noticeable from a distance nor a photograph. This is the first panel wrapped... 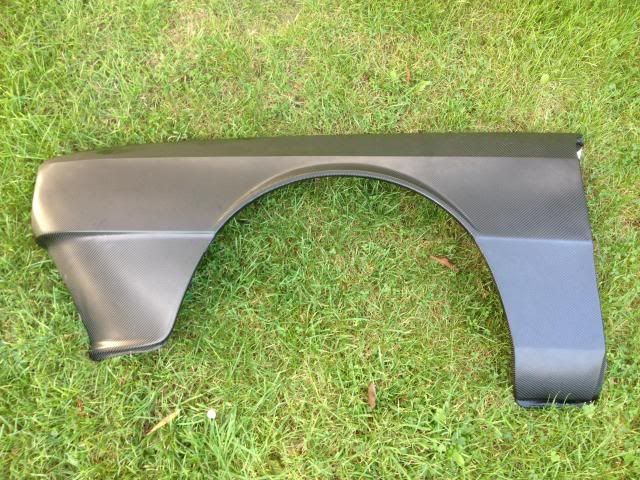 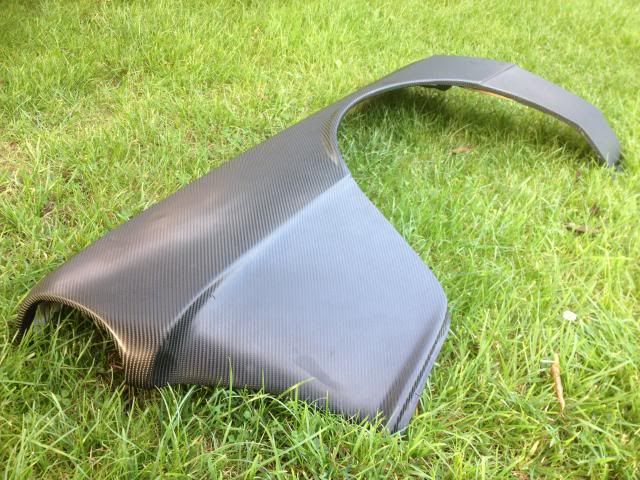 Bearing in mind the original wings are still on, this will give you an idea of the colour change and how it should eventually look... 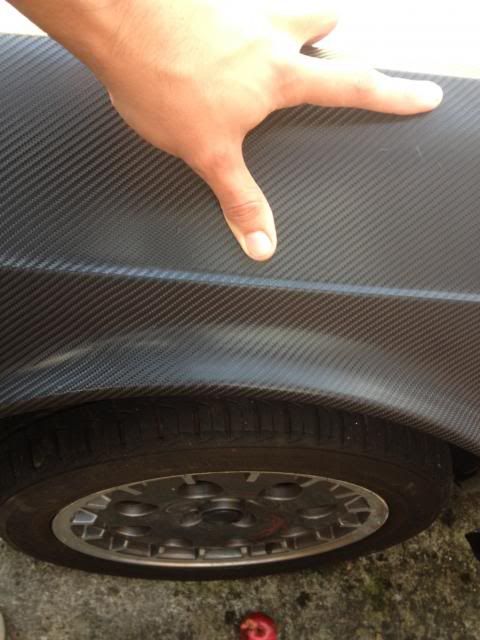 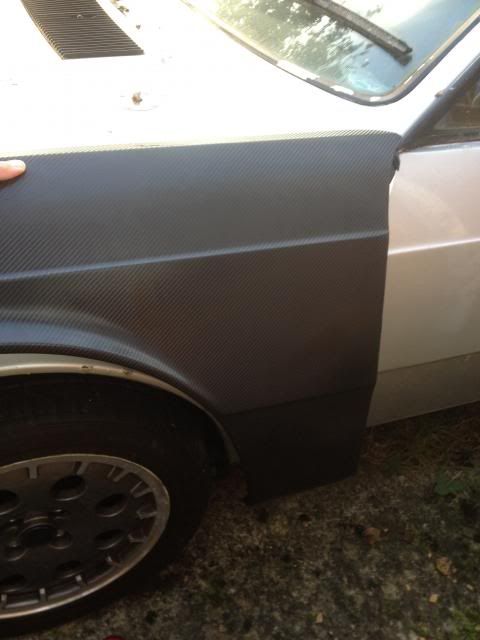 For the offside wing i've done it slightly differently to make it ultimately easier to do and to prevent little imperfections, so that the finish is smooth but at the cost of overlapping pieces. Overall it doesn't look too bad but might go back to it at a later date once i've got a bit more practice in... 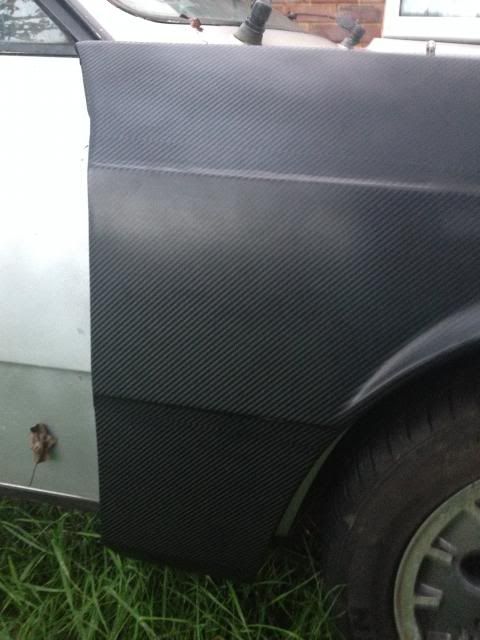 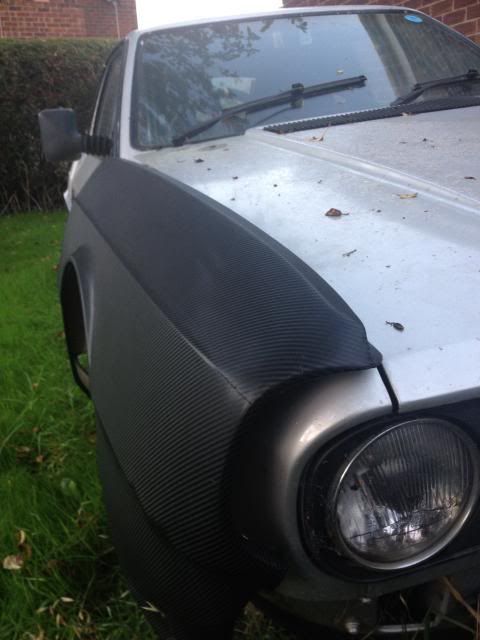 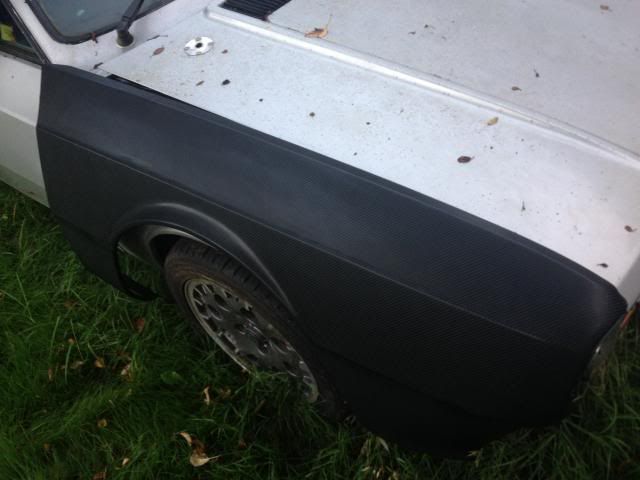 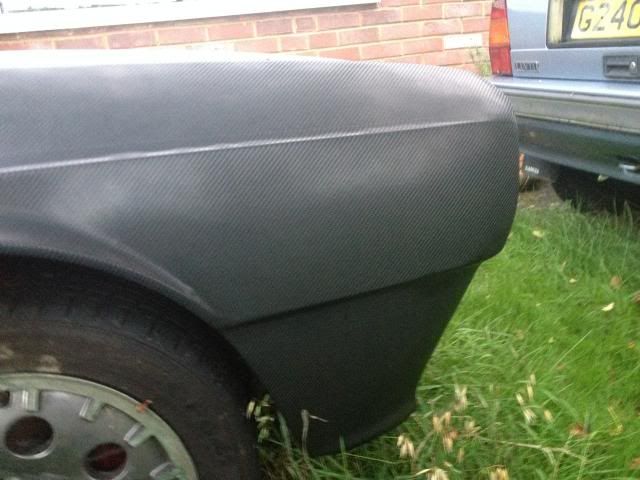 I think the plan for the doors and side panels will be to over lap pieces underneath the lines of the car matching the weave of the pattern as best as possible if it's not possible to get a good finish as one whole piece on the panel as I did with the first wing. Big areas such as the roof and bonnet will be covered as one piece. Once the car is covered I might highlight certain parts of the car such as the window frames, around the bonnet pins, possibly even the mirrors, handles and grille in a slightly lighter silver 3d carbon fibre look. The idea is for it to stand out without looking tacky and if it should be parked in the local fast food outlet most weekends, but were see how it goes!  Next step, choosing the best of the earlier type front valances I have and getting it prepared for the next load of vinyl  |
|
|
|
|
 Logged
|
|
|
|
lanciamad
http://www.flickr.com/photos/lanciamad
Hero Member
    
 Offline Offline
 England
Posts: 699
Marcus Robinson
|
 |
« Reply #155 on: November 17, 2014, 10:23:35 PM » |
|
Time seems to fly these days  a change of shared track car, daily runner, not enough time, money and the usual excuses, there's not much to report on the car since being parked up. Bodywork issues and decisions aside, i'm hoping to spend some time continuing on the long term ambition of getting my budget throttle body setup all together and on the car in the not too distant future, famous last words. I have a lot of the parts bought, it's just going to be the fitment and setup side which is going to take some time I feel. One of the parts i'm yet to purchase is an O2 / lambda sensor, which of course is going to need to be fitted to the exhaust system at some point, so this is my next little project towards the overall aim. I had an Ansa manifold fitted a little while back, but at the time, with the norfolk betameeta upon me and the car needing to get through the mot, I had to put the original manifold and downpipe back on as the Ansa was blowing. With it all wrapped in heat wrap I couldn't tell how bad it was and it's been in the shed and not looked at until today. It didn't sound or feel great with what felt like a lot of crunches and flakes of paint trapped in the wrap, so it was time to get unwrapping the heat wrap that didn't look too great anymore and see how bad it is... 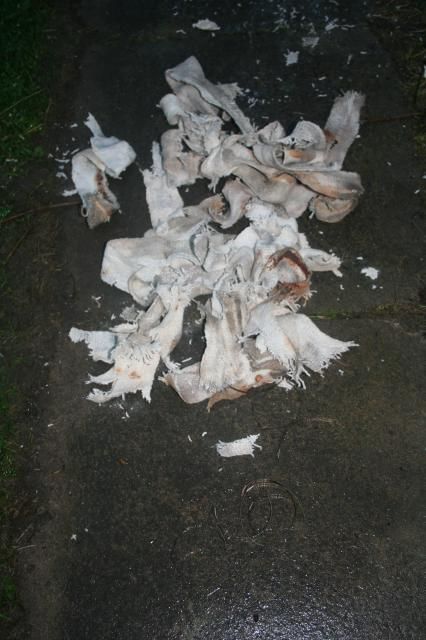 Having given it a good rub off all over, it turns out to be in a lot better condition than feared and still has many more miles in it yet... 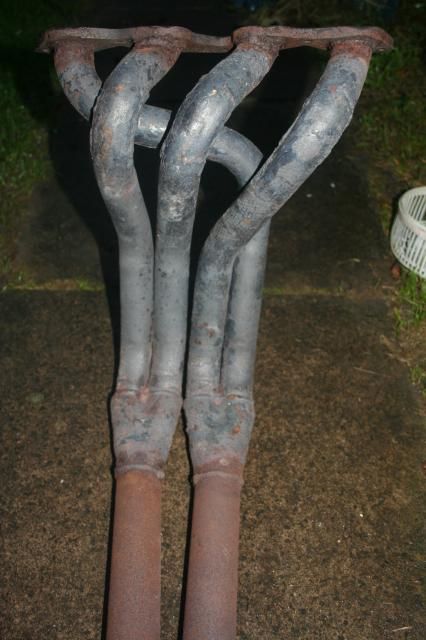 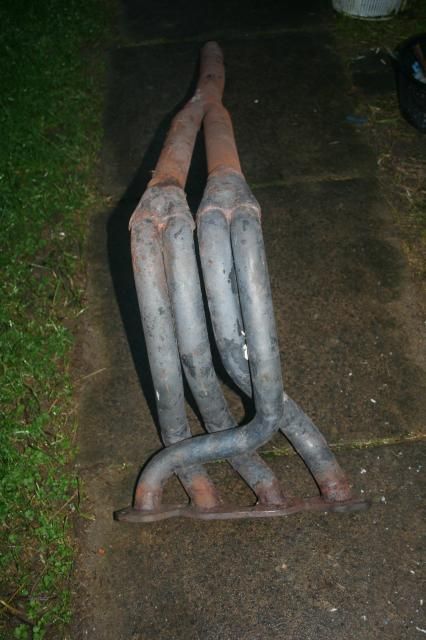 The offending blowing is from a crack along the weld, thankfully in an easy place to repair... 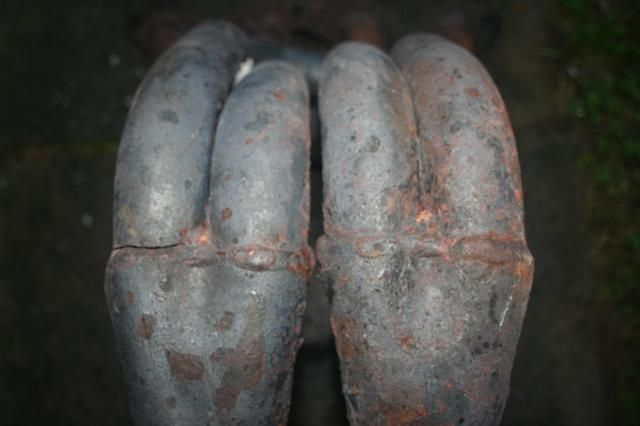 and a closer look... 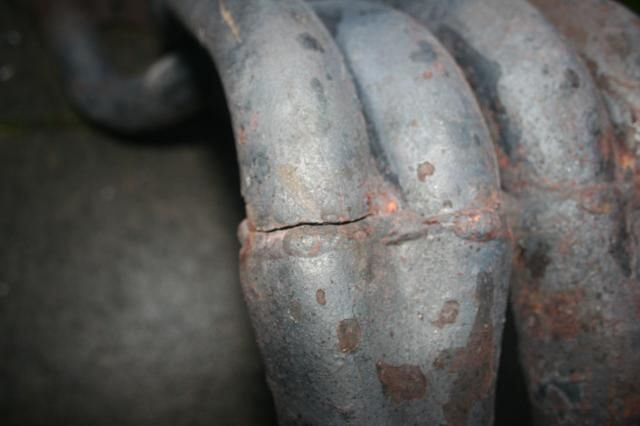 Plan for the manifold is to weld the crack up, give it a thorough sand over and drill a hole to weld a boss in place for the lamda sensor. This is probably going to be fitted just before where the middle section joins the manifold, where it goes from 2 into 1. I'm going to use the exhaust manifold gasket to do a bit of work to the ports and see if I can remove a bit of material with the dremmel, and then give it a thorough covering of heat resistant exhaust paint to smarten it all up. Once that's all done it'll be re-wrapped in new heat wrap and metal ties and be in fit shape to go back onto the car... eventually! |
|
|
|
|
 Logged
|
|
|
|
|
|
lanciaski
Jr. Member
 
 Offline Offline
 United Kingdom
Posts: 21
|
 |
« Reply #157 on: November 24, 2014, 10:52:23 PM » |
|
Why are you going to paint it then wrap it?
|
|
|
|
|
 Logged
|
|
|
|
|
HFStuart
|
 |
« Reply #158 on: November 25, 2014, 01:26:02 PM » |
|
The heat wrap doesn't prevent corrosion. The paint will to a certain extent
|
|
|
|
|
 Logged
|
|
|
|
lanciaski
Jr. Member
 
 Offline Offline
 United Kingdom
Posts: 21
|
 |
« Reply #159 on: November 25, 2014, 02:57:13 PM » |
|
that makes sense although i don't imagine that there will be much moisture building up on the outside of the pipe even with the wrap. its got its own dryer.....the corrosion generally comes from within on exhausts but I've never had problems with the downpipes before? they run so hot they just dry out when you park up?
|
|
|
|
|
 Logged
|
|
|
|
|


